
I have been doing a lot of sewing lately (nothing exciting - mostly Skirts for my daughters Ballet Company).
Unfortunately my (downstairs) workroom is a mess, so I end up using the (upstairs) kitchen as a work space. I have these little bowls of pins in several locations throughout my house as I'm working on projects.

Which is not a big deal (other than the fact that they are not very cute).
But in the past 2 weeks I have dropped/slit/knocked/pulled these bowls onto the floor at least 3 times.
Pins scatter everywhere.... the Bowls break.... I end up Searching for hours to be sure to find all the Pins.
I decided it was time for a different method.

I'm sure I could have gone to the store and purchased a very functional Pin Cushion.... but what Fun would that be?
Since I have a fairly large STASH of just about everything (in that totally messy workroom I mentioned above) - I had all the bits and pieces needed for this project already at home.

They are made from colorful acrylic picture frames that I found in the dollar bins and Michaels.
I love the happy colors and ornate designs.

I twisted off the stand up easel portion from the back of one of the frames (you will see Why - later).

To make the foundation of the pin cushion - I used the paper insert shape from each of the frames and traced onto a piece of chip board*, and cut them slightly smaller to allow room for the fabric wrap around.
*I lied. I didn't really use chip board (because it's lost somewhere in the messy workroom downstairs and I'm afraid to go searching for it). I used the cardboard back of a notebook paper tablet.

Now comes the FUN part.
Picking through my fabric scraps to find the perfect match.

Should I use tonal colors that match the frame color?

Or go Bold with something Bright?

Maybe a little of each?

I used layers of cotton batting to "stuff" the pin cushion. Each layer is cut slightly smaller than the chip board base shape.

Once the fabric is wrapped around the batting, I then used the very sophisticated method of taping the fabric on the back of the chipboard base.
After the fabric is taped on all sides, its easy to slip it into the picture frame.

I added some Hot Glue to the back seal of the picture frame opening to keep it all secure.

For This frame I kept the back Stand Up Easel in place.
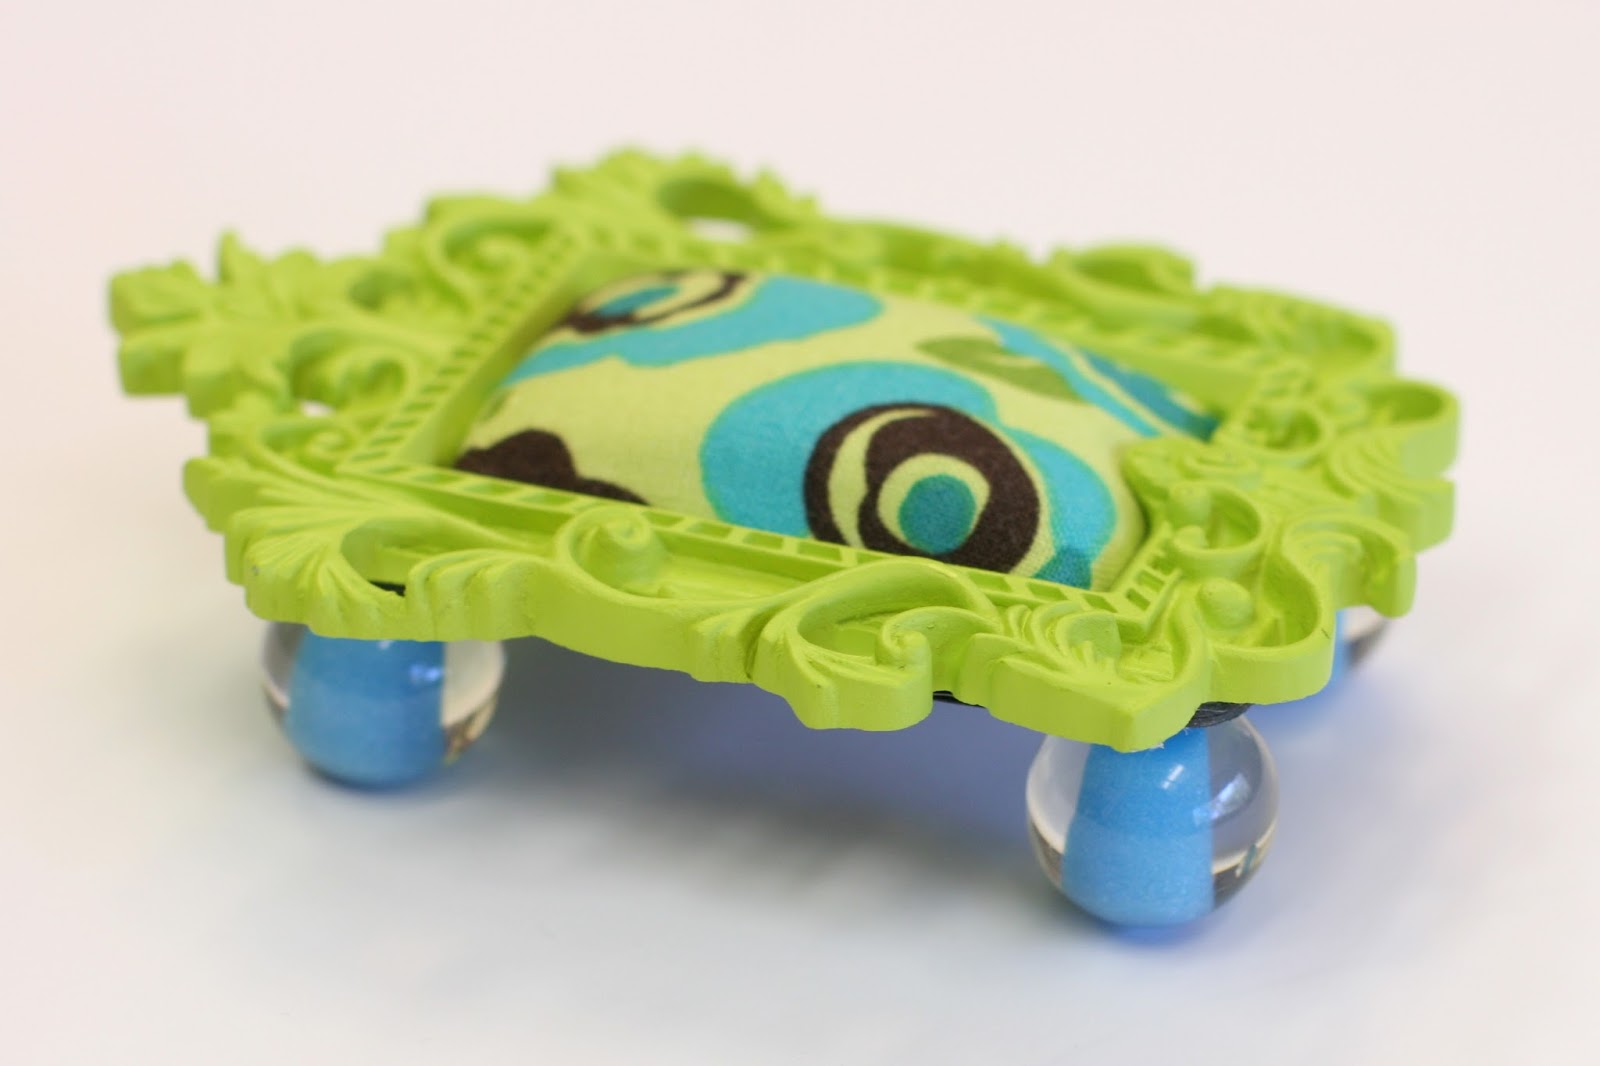
On another frame - I added 4 chunky acrylic beads to the bottom (remember I pulled off the stand up easel from the back).
The beads were Hot glued to each of the corners like little Feet.

Now I have a few sweet colorful Cushions to keep my sewing pins in place.
I'm going to have to make another Larger version to use by my sewing machine (where the majority of the pins end up), so I'll be watching the clearance section for some unique shaped, colorful picture frames.