Friday, June 12, 2015

My Creative Space

I love seeing where other crafters create.  What their crafty spaces look like, and how they keep organized.

Now it's my turn to share my Craft Studio. 

Each of the Design Team members at The Pink Elephant Blog is showing what their creative spaces look like  There are some wonderful organization and storage ideas to be found - go take a look

I have a dedicated room (I know - I'm a lucky girl) that is in the basement so it stays cool in the summer (the temperature here in California is currently 100+ degrees), and also warm in the winter.  

But unfortunately, it also gets very little natural light, which was apparent as I tried to take pictures and found it hard to capture the true colors.  I guess it's time to call the electrician and get those recessed lights installed.

The room has a counter height island table in the center - under the chandelier - with storage on each of the surrounding walls. 


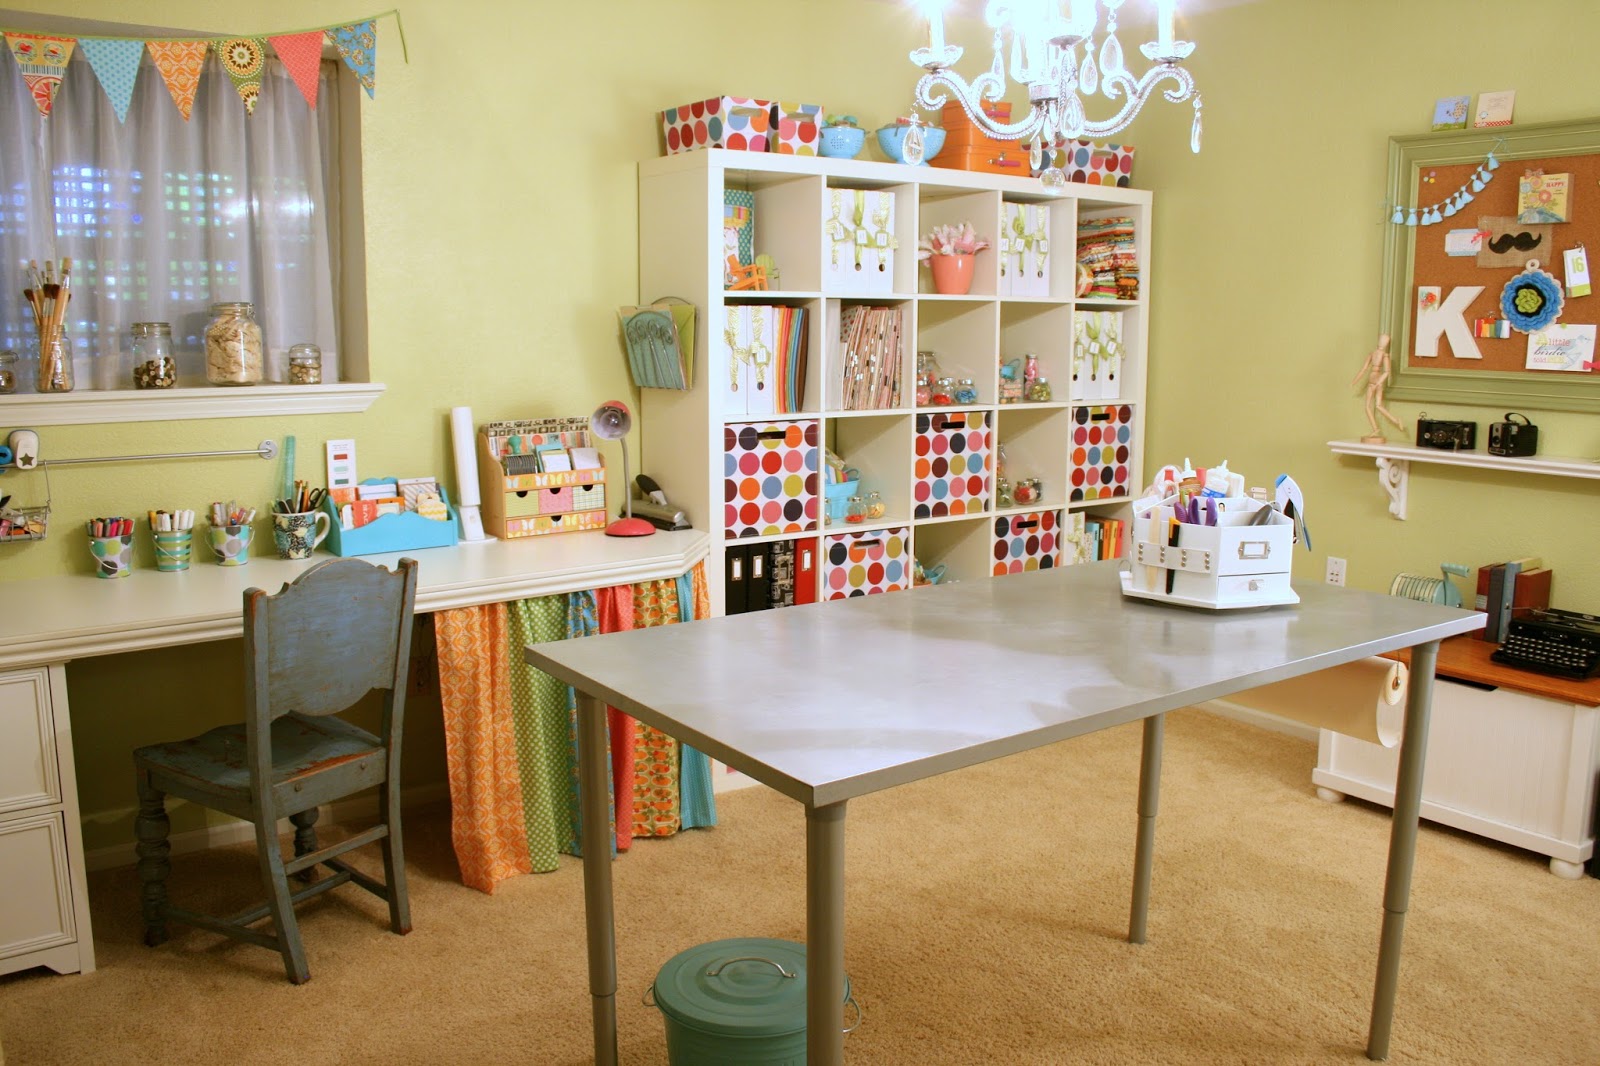
At the end of the table I installed a hanging paper roll.  I don't worry too much about getting paint or ink on the table top because I like that used/distressed look.  But it's nice to have at my fingertips for those super messy projects.


Continuing around the room, i have a large framed cork board filled with different bits and pieces that make me happy.  Part inspiration.  Part storage.  Part organization.


I change it up for the seasons, or whenever a whim moves me.


Underneath I have some vintage cameras - and other vintage office equipment sitting on a toy chest made by my dad (originally made for my now-teenage daughter).  That's where I store unfinished projects.


This room originally had no closets, and was used by the previous owners as a Media Room. 
That should have been my fist clue that the lighting wasn't going to be good. 

We built out closets along one entire wall, but left a little corner nook. 


I wanted to have a separate writing area with open shelves that hold note cards and pretty bowls of paper clips and push pins.  


the closet doors keep everything hidden inside.  But also open up completely flush against the wall, so as I'm working at the island, I can have all the supplies  inside readily accessible.  
 

One side holds mostly fabrics and sewing notions. 


The other side has all my crafting and scrapbook supplies.


My husband and I made hanging frames to hold spools of ribbons (just one of my collecting obsessions).  Nothing makes me happier than having a rainbow of ribbon at my fingertips.


The left side wall is where my sewing machine sits.  

The wooden sewing cabinet was given to me by my mother when I moved into my first apartment.  It's the machine I learned to sew on as a teenager.  I now use a new sewing machine, but the old one is still in the cabinet (someday I'll get around to getting it working again). 


An old kitchen cabinet above my sewing machine stores various notebooks in the plate rack slots (another of my collecting obsessions), and bakers twine in glass sugar shakers. 


My mom (the quilter) made this cute dust cover for my sewing machine.  it's the perfect touch of color to brighten up the well-used wood cabinet.  


On the other long wall, we created a workspace from a piece of white laminated wood.  It's supported by two file cabinets on one end, and attached to a cube storage unit on the other end.  A little painted wood trim to finish the cut edges and it looks like a custom built-in. 


I use a mixture of vintage and new glass jars for storage.  The window ledge above my work desk has jars filled with buttons, ribbons, brushes and twine in neutral shades of cream & white.


I store my punches on towel bars mounted to the wall.  it worked well for me as I don't have a huge collection of punches, but I'm quickly outgrowing this storage method.  


The bottom of my workspace used to be completely open, but I recently added these colorful curtains.  Not only do they match the sewing machine cover, and window swag - but they also hide some not-so-pretty plastic mismatched storage bins. 


As we finish the tour around my craft studio - the last stop is a close up look of the cube storage unit.  


I keep my washi tape organized by color in kitchen colanders sitting on top of the unit. 


More collected items - like vintage handkerchiefs and spools of thread - are displayed in the cubbies. 


Some of my favorite fabrics are tucked into metal bins.  Buttons and flowers in glass jars are spread out throughout the cubbies as colorful accents - but still easy to get.  


A little satin ribbon and tags give plain white magazine boxes some pizazz, and remind me of what's inside.  

Thanks for coming along on this tour of my crafty space.  
It makes me happy and inspires me to create.

I hope your space does the same for you. 


Thursday, January 22, 2015

Hoop Art Wall Hanging

I was looking for a craft idea that would help teach simple sewing skills.  Several of my mom friends (and their girls) have expressed an interest in leaning how to hand sew.  

I thought this pretty little framed fabric art piece would be the perfect project. 

 
It's made using simple embroidery stitches.  Not too difficult but with cute results.  A perfect way to practice stitching and knots.


The "frame" is an embroidery hoop.  I found some colorful options, but in the end decided to use the traditional bamboo version.  


I gathered up an assortment of fabric scraps, decorative buttons and embroidery floss to match.  


The green strip of fabric was sewn to the bottom with a fairly large Running Stitch using a dark green thread (because I wanted the stitches to stand out).  I pulled at the top cut edge of the fabric to "fray" so it resembled blades of grass.  


Once the grass was sewn in place.  I positioned the hoop and cinched it down.  Then I marked where each of the flowers would be, using a fabric marking pen.  

The Large flower is made from a fabric YoYo with a blue button center.  The Orange flower is shaped button (tied with a blue bow).  The Pink flower is stitched using the Lazy Daisy embroidery stitch with French Knots for the center. 


The flower stems are stitched with a Running Stitch using green embroidery thread and a tiny felt leaf is sewn on with lighter green thread.  


Lucky for me - my mum has a collection of nearly every color of embroidery floss ever made.  So fun choosing just the right shades from this box (1 of three) of candy colored threads. 


Once the stitching was done, I cut the background fabric just slightly larger than the outside of the hoop.  


From the backside, I folded the fabric over and glued it in place around the inside of the hoop.  


Using a low temp glue gun is the best choice.  That way you can use your fingers to press the fabric into the (not too hot) glue before it hardens. 


To cover up the messy bits and stitches on the backside of the fabric, I cut a white felt circle and glued that around the edges of the hoop for a tidy back. 


I stitched a blue button to the center of the YoYo, and tied a strand of embroidery floss into a bow through the orange flower button.  Each of the flowers were glued in place atop their embroidered stems.  


The final touch was a polka dotted bow glued to the top of the embroidery hoop screw attachment.  


Now this sweet little Hoop Art Piece is ready for hanging.  

But first I think we will make a few more in different sizes.  I can imagine stacked button flowers.  Rolled felt flowers.  Maybe a kite flying in the wind?  So many ideas swirling around in my head....I better gather up a few friends and have a sewing craft party. 

Tuesday, January 13, 2015

Back to Bento

January always brings new optimism that I CAN accomplish all things. 

One thing in the list for this year is to get back to making Bento Lunches for {not so little} Little K. 

Inspired by my Bento Buddy Sheri at Happy Little Bento to get back to it. 


Unfortunately I didn't have much to work with today, but I'll be sure to put my favorite Bento foods on the shopping list this week.

Sticky rice (leftover from yesterday's lunch) with a Turkey and cheese flower decoration on top.  Cucumber sticks and blanched carrots & cauliflower fill the veggie tin.  I also included a fruit squeeze, peanut butter crackers and a fruit bar. 


Everything was packed into this sweet oilcloth lunch bag (and then promptly crammed into a very full back pack). 

You can find the Lunch Bag tutorial here.

Considering the rough ride these bentos now have to endure being carried from class to class until 1PM lunch time, I don't think I'll be able to send any delicate creations like I used to. 


(This is one of my most popular bentos - viewed nearly 8,000 times)

But there is no reason I can't include a little something Pretty in her lunches. 

I've forgotten how much fun it is. 

Happy Bentoing. 

Thursday, September 18, 2014

Picture Frame Pin Cushions

I have been doing a lot of sewing lately (nothing exciting - mostly Skirts for my daughters Ballet Company).  

Unfortunately my (downstairs) workroom is a mess, so I end up using the (upstairs) kitchen as a work space.  I have these little bowls of pins in several locations throughout my house as I'm working on projects.


Which is not a big deal (other than the fact that they are not very cute). 

But in the past 2 weeks I have dropped/slit/knocked/pulled these bowls onto the floor at least 3 times.  

Pins scatter everywhere.... the Bowls break.... I end up Searching for hours to be sure to find all the Pins.

I decided it was time for a different method.  


I'm sure I could have gone to the store and purchased a very functional Pin Cushion.... but what Fun would that be?

Since I have a fairly large STASH of just about everything (in that totally messy workroom I mentioned above) - I had all the bits and pieces needed for this project already at home. 


They are made from colorful acrylic picture frames that I found in the dollar bins and Michaels.  

I love the happy colors and ornate designs.


I twisted off the stand up easel portion from the back of one of the frames (you will see Why - later).


To make the foundation of the pin cushion - I used the paper insert shape from each of the frames and traced onto a piece of chip board*, and cut them slightly smaller to allow room for the fabric wrap around.

*I lied.  I didn't really use chip board (because it's lost somewhere in the messy workroom downstairs and I'm afraid to go searching for it).  I used the cardboard back of a notebook paper tablet. 
  

  Now comes the FUN part.

Picking through my fabric scraps to find the perfect match.
 

Should I use tonal colors that match the frame color?


Or go Bold with something Bright?


 Maybe a little of each?


I used layers of cotton batting to "stuff" the pin cushion.  Each layer is cut slightly smaller than the chip board base shape.  


Once the fabric is wrapped around the batting, I then used the very sophisticated  method of taping the fabric on the back of the chipboard base.  

After the fabric is taped on all sides, its easy to slip it into the picture frame.


I added some Hot Glue to the back seal of the picture frame opening to keep it all secure.  
 

For This frame I kept the back Stand Up Easel in place. 


 On another frame - I added 4 chunky acrylic beads to the bottom (remember I pulled off the stand up easel from the back).  

The beads were Hot glued to each of the corners like little Feet.


  Now I have a few sweet colorful Cushions to keep my sewing pins in place.  

I'm going to have to make another Larger version to use by my sewing machine (where the majority of the pins end up), so I'll be watching the clearance section for some unique shaped, colorful picture frames.