Showing posts with label Just Plain Cute. Show all posts

Tuesday, November 20, 2012

Woodland Party Invitation

Every year we host a Holiday Party for my husbands staff.  Since he works in retail, we try to plan the party before the crazy fall holiday rush.  

Even though it is a Holiday Party - it's a bit strange to follow a traditional Christmas theme when the gathering is in early November.

Last  year we had a Harvest Party.  You can see more about the party here and here, and more about how we decorated for Fall here and here.

This year I decided on a Fall Woodland Theme for the Party.


I fell in love with the sweet critters on the Cricut Create A Critter cartridge and knew I just had to incorporate them into the invitations (I ended up using them elsewhere too).


Yes - I agree - the invitations are a bit "cutsie" for a work staff party - but I just couldn't resist.   

Plus, I think I ended up making other elements of the party "sophisticated" enough that it didn't end up looking like a childs birthday party.  


The card was pretty simple without a lot of details (other than the layers of the cricut cut squirrel).  I ended up making 18 of them, so after number 10 or so....I was pretty happy the elements were basic. 

I really enjoyed working with the primarily Green and Brown color palette (for the card, and other details of the party).  Even though it looks somewhat Christmasy with the pops of mushroom red - it definitely reads Woodland.  It also helps that my favorite color is Green - so I had lots of stuff already on hand to work with.

I'll be back to share more details of the Party soon.

Tuesday, September 11, 2012

School is a Hoot - Back to School Breakfast

We were happy to host another Neighborhood Back to School Breakfast this year.

Although we cheated a little bit....
....and had it a week later - instead of on the First Day of School. 

Everyone was a bit more relaxed and over their first day jitters.
The morning started with a group of cute little Owls set up to greet the guests.


Yep - made from Toilet Paper (and Paper Towel) rolls.

Painted bright colors.  Embellished with dotted cardstock Wings, Bows and of course Google eyes.


The Owl Theme started when I came across these great free printables from  Delightful Designs.

The "Going Back to School is a Hoot" framed art is the front cover of a mini book (part of the free download).  I just enlarged the cover page and used it in a Frame. 

The polka dotted matte was made at the same time we were painting the TP Owls using foam daubers to create dots on a plain white matte.


I found these lightweight plastic frames at Michaels and added another copy of the same (enlarged) Art Print and hung them on the front door with a green ribbon. 

Little K and I had so much fun making these owls.  There was an entire army of them lining the table and counter tops.


We just couldn't stop. 


The bookmarks were also part of the Delightful Designs free download (find it here).  I mounted them on colored swiss dot cardstock and added a glittery ribbon and some iridescent glitter glue embellishments.

 I thought about adding more google eyes - but decided that would make the bookmarks too thick. 


Each of the kids place settings had their Name and another personality filled Owl.  I used the Cricut Hoot n Holler cartridge. 


On the inside of each of the Name Cards was a silly school Joke.  I used the pages from the mini book download from Delightful Designs and cut them apart so each child had a different joke to tell. 

Nothing funnier than a bunch of budding comedians and the breakfast table.


These Owl Snack Bags were made using the Cricut Lacy Labels cartridge.  The head is one of the scalloped frames folded over a cellophane snack bag.  Yellow and white punched circles for the eyes,  google eyes in the middle of the circles and a bright beak.


Inside they were filled with a tropical granola mix.  The brightly colored fruit bits worked perfectly with the colorful owl theme.  


I wanted to add a few bows, but ran out of time. 


In keeping with our annual tradition - we took pictures of all the kids (and the moms too).


I planned on using large paper mache numbers (painted in the tropical theme colors) for each of the kids Grade Numbers, but I couldn't find ones that were big enough.  So I modified and used a wooden heart, painted and embellished with a Cirucut cut Number.


Would you believe we already had this glass owl flower vase?  The perfect finishing touch to our Back to School is a Hoot theme.

I hope the first Days/Weeks of school are going great for you and the kids.  We are off to a great start - looking forward to a wonderful year ahead.  


Friday, May 6, 2011

Teachers Appreciation 2011

We are coming to the end of Teachers Appreciation Week.

At Little K's new school - the PTA does a great job coordinating the efforts throughout all the classrooms. They put out a schedule suggesting ways to show your appreciation to the teachers on each of the days of the week. You have the option to participate in as many days as you like.

Monday - the Teachers were all greeted with the outside of their Classroom Doors Decorated.

Door Decoration

I was a bit worried - because her teacher is not much of a cook - but I loved the idea of showing how she nurtures and develops her students.

Recipe Card

The recipe card spells it all out.

Cooking Close Up

I went with a clean - sort of retro style to fit her teachers personality. She loved it.

Funny Story Side Note: I went to the school early on Monday morning (it's an outdoor campus) to put up the door decoration. As I'm working - a bright flashing light starts to go off (like the fire alarm, but white) - and then a voice comes over the loud speaker. "Unauthorized Activity Detected - Photo Taken".

YIKES - apparently the school has motion detectors, and when I started working on the door - I tripped the alarm. Picture me - in my sweats, no morning shower yet, and my hair barely combed. That's going to be one lovely picture.

Luckily - I had already seen the custodian on the grounds, and she told me not to worry about it. Apparently all the other Room Parents put up their decorations on Sunday - Oops.


Tuesday - was the day that each child brought in an individual flower. The roses are all in full bloom here - so she ended up with a beautiful bouquet.

Contemporary Vase

I brought a vase in to hold all the beautiful blooms. She has a bit of a contemporary style, so I went with something more modern. Added a strip of paper and twine as an accent.

Thank You Tag

And a stacked tag. The outer one says "Thanks". The one underneath says "for helping our kids bloom".

School Bouquet

Wednesday - the kids were asked to bring in a home made card or note.

Thursday - was the day to bring in any Gift Cards. I asked for her teachers input before hand and suggested some of her favorite stores to the parents.

Friday - was Fruit Basket day. The kids brought in a single piece of fruit.

Fruit Basket

We've had a huge participation from the kids so far - I hope the basket is big enough to hold all the fruity bounty.

Fruity Thanks

I made a print using Wordle and some corny fruit sayings, and attached it to the basket handle.

Apple Cosy

This is the piece of fruit Little K brought in for her. We had to dress it up just a little. Isn't this apple cosy adorable?

I can't take the credit - I found the pattern here, and sent the materials to my Mom to crochet (since that's something I was never able to master).

Apple Cosy Collage

She had so much fun making them - she whipped up a few extra. Guess what Little K's teachers are getting next year!

In addition to all the individual classroom efforts, the PTA also acknowledges all the Teachers with a Breakfast (on Monday), Lunch (on Wednesday) and Car Wash (on Friday).

Happy Teachers Appreciation Week to all our Teachers - and Thank You for all that you do!

Tuesday, March 23, 2010

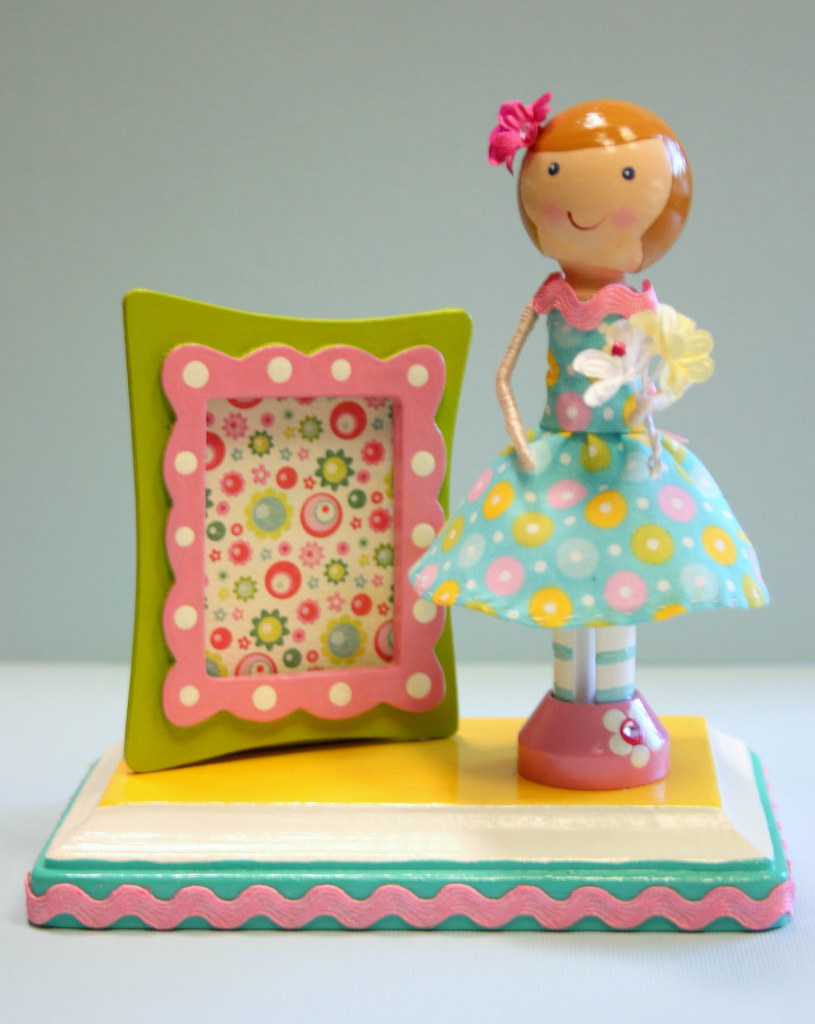
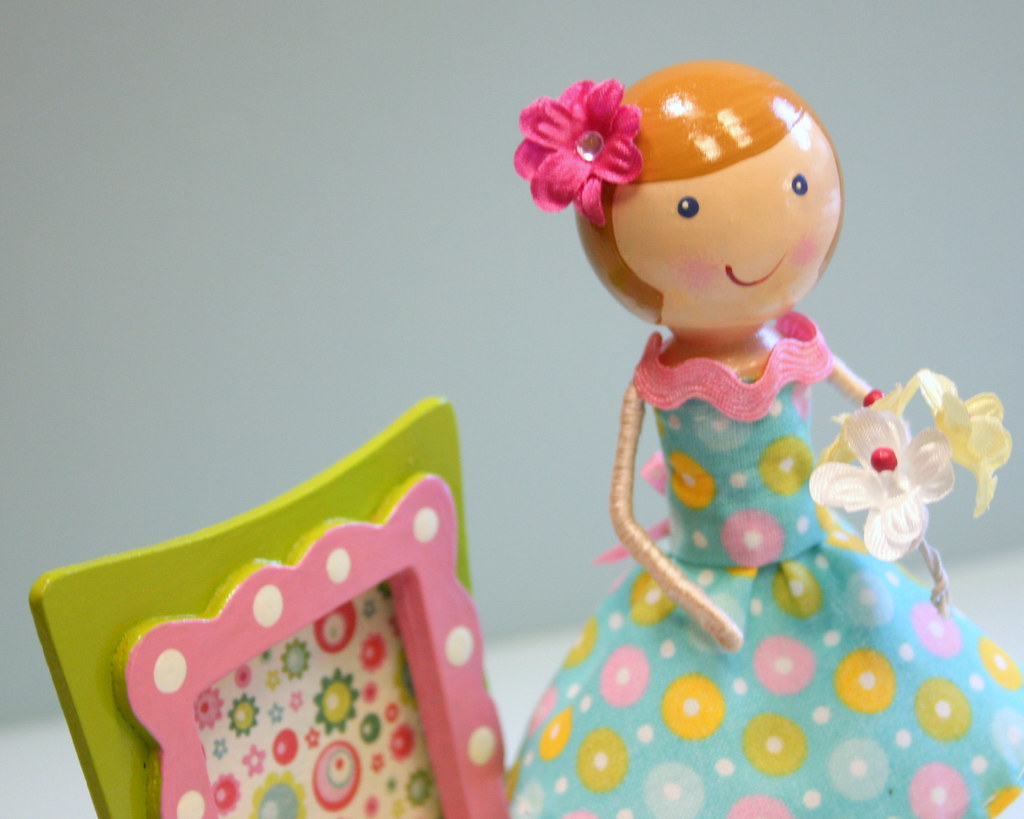
Clothespin Doll for Grace

The very first clothespin doll I ever made was for our little friend Ava's 6th Birthday. They have been so much fun. I've made several more (for Little K, and for other friends).

Ava has a Big Sister Grace....and last weekend was Graces 9th Birthday. Their mom put in a little hint that Grace might want her own clothespin Doll - so that's what we did.


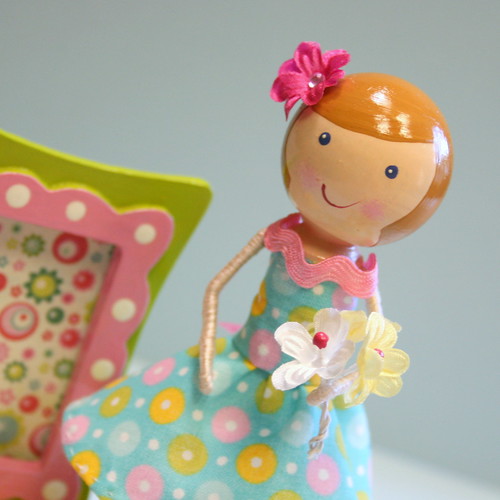
I used a coordinating dress fabric (to Ava's doll), as the girls share a room and the dolls will be displayed together.


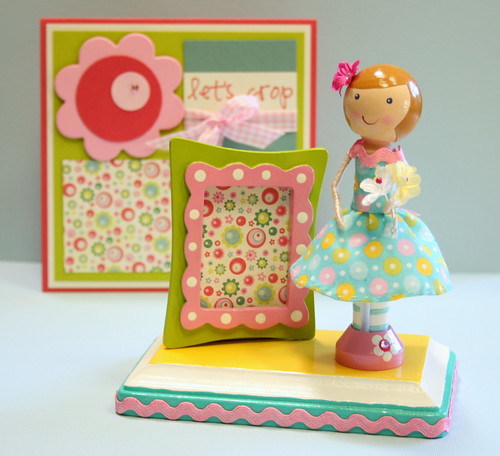
Grace's Birthday was a Scrapbooking Party -and we coordinated the doll to the invitations. Added to the base is a picture frame. I used the same paper from the invites for the back of the frame so it still looks cute even without a picture in place.


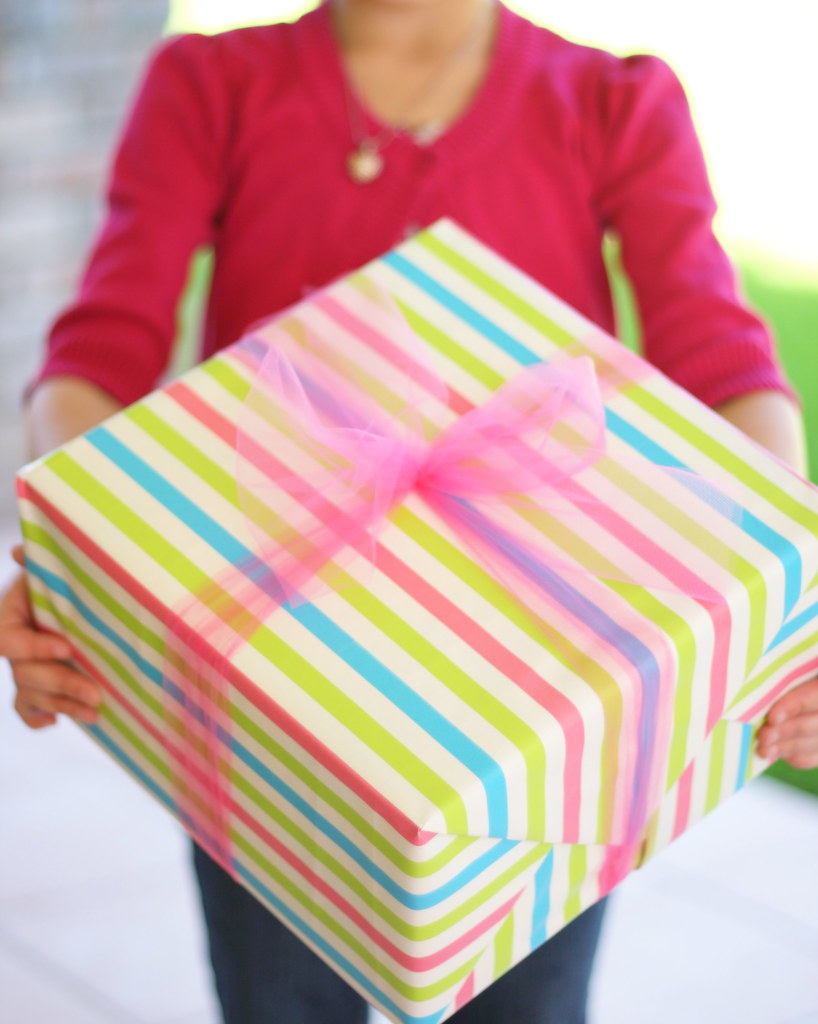
We even found wrapping paper that coordinated with the party colors.


Don't you love it when it all comes together.

Monday, February 22, 2010

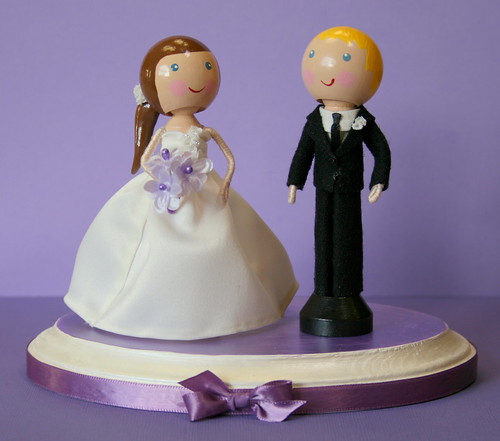
Wedding Cake Topper

I have been commissioned! Well, not exactly - but that's how I would like to see it.

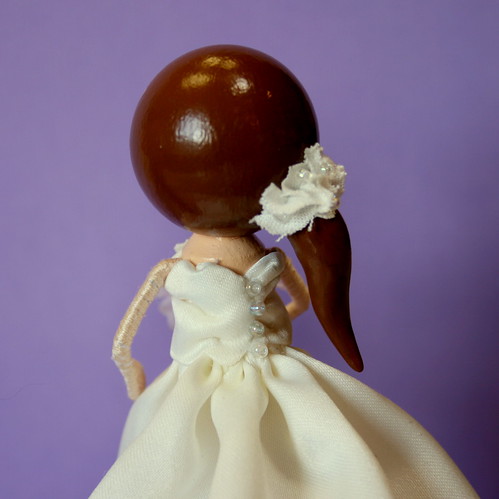
I was contacted a few weeks ago by a "bride to be" who had seen some of the clothespin dolls I made on my blog. She sent me an e-mail asking if I would be willing to make a Bride and Groom Cake Topper for her Wedding. Did you hear me - for her Wedding!

Shock - Oh, the pressure. I'm perfectly fine making them as gifts - but for an actual paying customer - and for an event as momentous as a Wedding. I was honored, but I had to think about that for a bit.

The conversation has actually come up several times before. I figured this must have been a sign that I was meant to make a Bride and Groom. I decided to take the plunge. I responded to her that I would be willing...but with several points of understanding:

- I have never made a Bride or Groom before - she had full right of refusal if she wasn't happy with the results - there had to be enough lead time to find a different topper if needed -


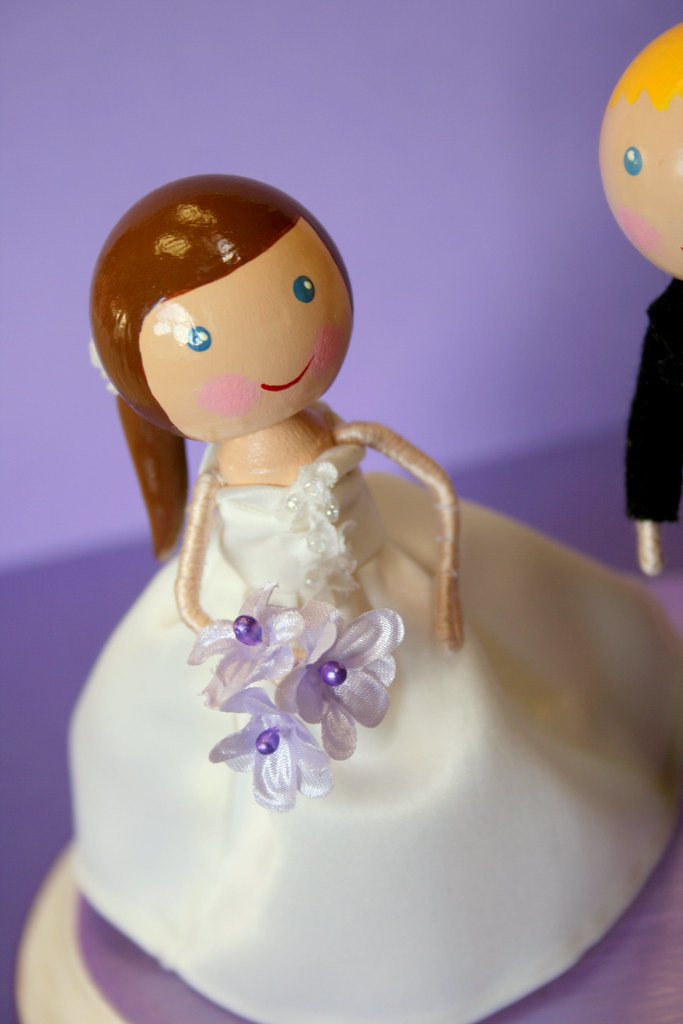
And so - I got started. I asked for all kinds of details about the wedding, her dress, what they looked like, flowers, colors, clothing details and more.


She sent me a link to see the
dress (style 1409) she will be wearing.


And even a photo of the two of them so I could match skin tone, hair and eye color.


The colors of their wedding are Plum and Lavender.


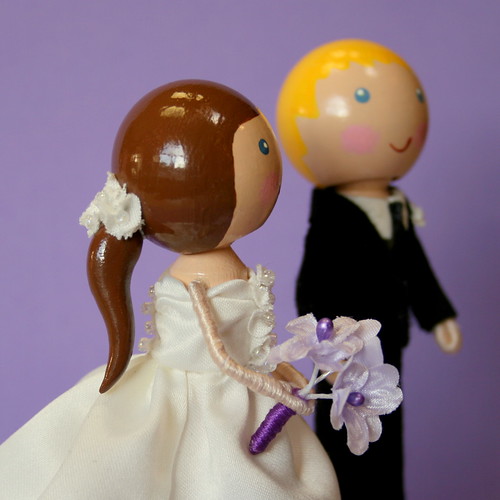
She will be wearing her hair down, but I had to take some creative license with that one, and made a side swept pony. It would have been so much easier if she had short hair and would be wearing a veil.


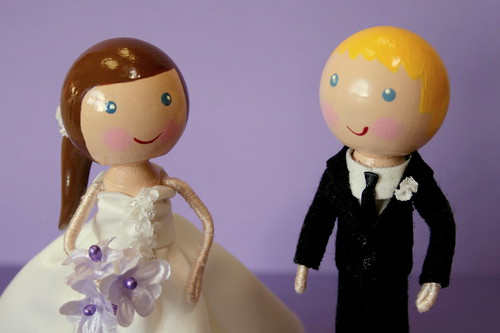
I was so excited to send her pictures of the completed topper. I think they couldn't be cuter, and I had a blast making them. The Groom was actually not as hard as I thought.

Here is where things start to get a little strange. After weeks of pleasant and timely communication - as soon as I sent her the pictures of the couple - I never heard from her again.

I waited a week - sent another follow up e-mail - still nothing. Zilch - Nada - Zip - Not a Word.

My first fear was that something terrible had happened - maybe an accident? A Family Emergency? I certainly hope not.

There could be any number of reasons she didn't respond:

- It was a Scam - Some kind of a set up - Didn't like what I made - Reached the "Bridezilla" stage of wedding planning - Shocked at the price - Got cold feed and called off the wedding - Decided to make one herself - Parents refused to pay for it -

The truth is, I will probably never know. While my ego may have been bruised a bit if she told me she wasn't happy with the results, I would have understood - that was our agreement, and my first concern is that the bride be happy. I am disappointed, however, that she never contacted me at all to advise she didn't want to go through with our agreement.

The good news is - I'm thrilled with the results. I think they are so cute, I had a wonderful time making them, and I'm happy to have had the opportunity to push myself. Now I know - I can!

Plus - Little K has two cute new peg dolls she can play with - added bonus!

Tuesday, February 9, 2010

Fortune Cookie Class Valentines

There are some really adorable Valentine Cards available in the stores, but I just can't help myself. Valentines Day is another excuse to get out the crafting supplies.

I think original credit for this idea goes to Martha Stewart - but I saw it here - and knew it was perfect for Little K to make as Valentines for her 3rd Grade Class.


We were making 33 Fortune Cookies, so I purchased a total of 6 sheets of Craft Foam (2 each of white, pink and red). That gave me enough for the cookies we needed, as well as some "mistakes". I read that Martha's original version was made with Felt, but in this case, I think the craft foam is better for holding shape.


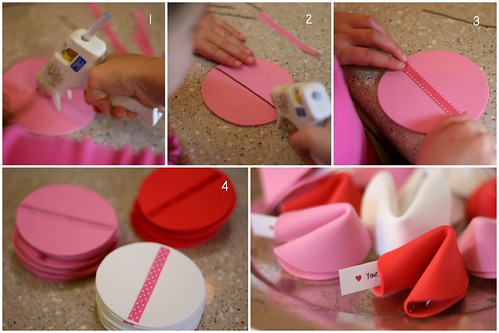
Draw and cut 4 inch circles out of craft foam. We traced a large 29 oz. tomato can, but you could just as easily use a die cut. If you are cutting by hand, be sure to cut just inside your marked line (you don't want any of the pen mark to show after cutting).
Cut assorted ribbon (to match the foam colors) slightly shorter than the diameter of the foam circles (in this case, a little less than 4 inches). Grosgrain ribbon - 3/8 inch wide - works best. Light colored or sheer ribbons don't hide the glue or wire as well (we learned that the hard way).
Cut pieces of 19 gauge wire slightly shorter than the length of the ribbons (in this case, approx 3 3/4 inches). Straighten the cut wire pieces until they are flat.

Now for the fun part. Assembly. This was the first time Little K has used a glue gun. It was a bit difficult for her to control the amount of glue - so some of the ribbons were a little gobby, but once they are folded into the cookie shape, you can hardly notice.
1) Place a thin bead of hot glue across the center (diameter) of the foam circle. (I lightly drew a line down the center to make it easier for Little K to follow).

2) Carefully place the wire on top of the glue, and add another bead of hot glue along the wire.

3) Quickly add the ribbon - pressing down with your fingers to secure the wire and ribbon to the foam circle.

4) You will end up with these cute little decorated rounds all ready to be formed into foam fortune cookies.


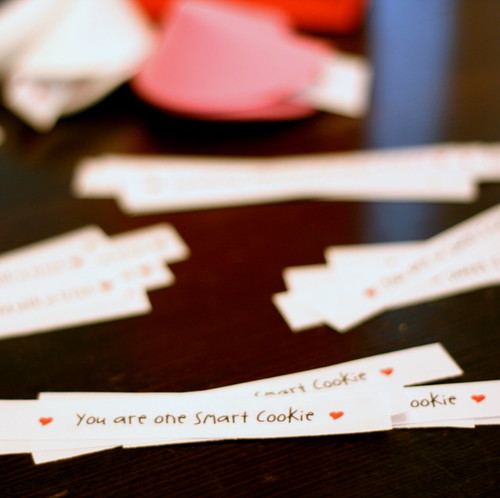
We printed assorted fortunes on the computer, cut them into strips to be inserted in the cookie.

- You are One Smart Cookie - Something Tasty will Come your Way -

- Your Good Deed will be Rewarded with a Treat - Something Delicious is in your Future -

- You are a Sweet Friend to Me -

Once the fortune strip is placed on the foam circle - fold it in half, and press in with your finger along the wired edge to form the fortune cookie shape. The wire keeps the cookie closed, but also allows it to be opened and closed over and over and still keep it's shape.


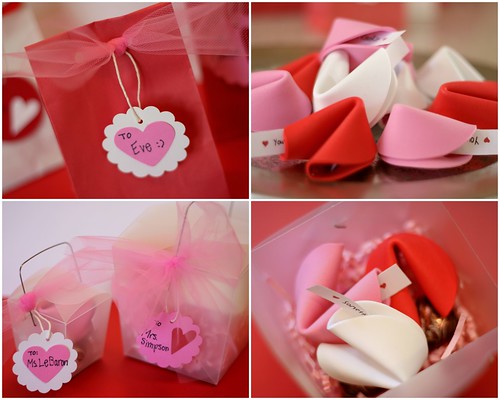
If the fortune cookie is large enough - you can even place small candy treats inside before they are folded. Ours were pretty close to actual size, so we added a few Chocolate Bliss candies (I found a heart shaped version) to the containers.

Teachers will get theirs in cute little velum take out containers with clorful paper shred. The rest of the class will receive colored paper bags decorated with punched name tags and ribbons.


Little K had a lot of fun choosing just the right fortune for each of her class mates.
Now, she not only knows how to use a glue gun, but wire cutters as well. Watch out world...there will be no stopping my little Craft Diva now.

Friday, January 29, 2010

I Won - I Really - Really WON!

I'm one of those people that say they Never Win Anything. I've entered the HGTV Dream Home Giveaway, bought dozens of raffle tickets at school functions, submitted my name for a Kitchen Make Over and still - Nothing. Maybe the door prize at Bunco, but other than that, not too many freebies have come into this house.

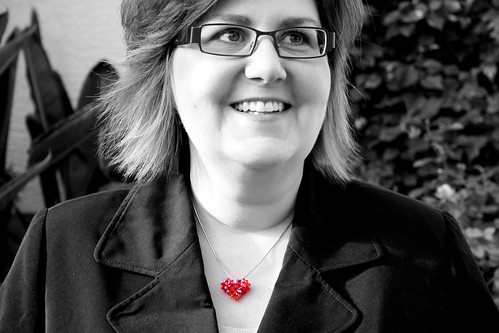
That all changed when I WON this beautiful Necklace. Don't I look Happy!


It was made by my Uber Crafty friend Roma. She saw someone wearing one - did some research on YouTube, and now she's beading up a storm.

She had the greatest giveaway on her blog (I'd send some Link Love her way, but it's an invite only Family Blog). You had to guess how many beads were used to make this Swarovski Crystal Puffy Heart Pendant.


I must admit - I cheated. I looked on YouTube myself. Unfortunately I found several versions. And to make it more complicated....Roma hinted that she may have been a little clever in her bead counting.

It turns out she counted not only the crystal beads you see, but there are also 2 big round ones inside to keep it puffy...plus the silver beads used to make the bale.

I guess Cheaters DO win - sometimes.

Thank You So Much Roma. I've gotten lots of compliments on it today! I'll be taking orders and sending them your way.

Monday, January 25, 2010

Ooh La La

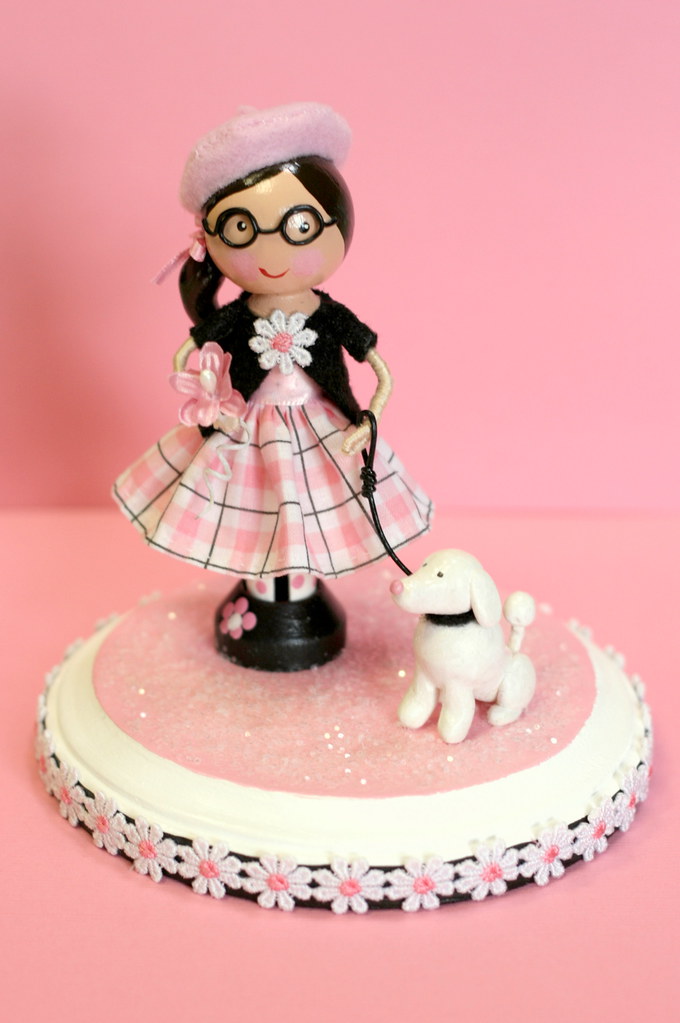
Little K was invited to a Birthday Party where the theme was "Pink Poodle in Paris". I had some ideas of what to get the Birthday Girl. We had a "Back to the 50's" party for Little K a few years ago, so I had done some poodle shopping before.

Somehow as we were talking about what gift to get, the conversation morphed into the grand idea of making her a Clothespin Doll - so that's what we did.


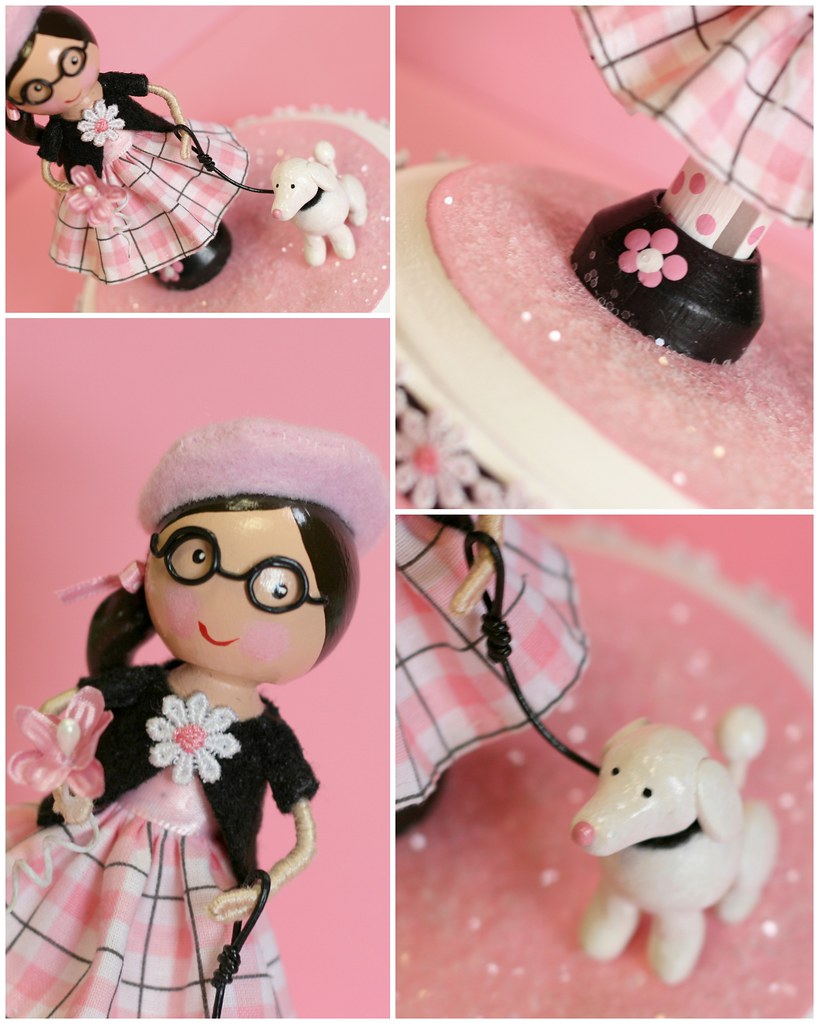
I wasn't thinking - I shouldn't have painted the base pink - because when it came time to make the polymer clay Poodle - pink would have blended in. So we ended up making it a White Poodle (who just happens to look more like a Labradoodle). Close enough!


I think my favorite part are the glasses. The Birthday Girls wears them, so of course her look alike doll had to have them as well.

I also like the beret a lot - but I think I made 6 other versions before I got it just right, so I'm still a little fed up with it to like it very much.

I'm working on another one right now - something else I have never attempted - but it's coming along very nicely - so stay tuned.

I was going to close with some cute french saying...but I have no idea how to spell in French (or English for that matter) - so I think I'll skip it.

Friday, January 22, 2010

I Love Packages

It never fails - every time we make a trip home to visit family - we seem to forget something. Luckily my Mom know this, and as she's cleaning up after our onslaught - she simply gathers up the little bits we have left behind - boxes them up - and sends them out to us.

It's nice to have our belongings returned, but it's even nicer when the package contains some extra fun little goodies.

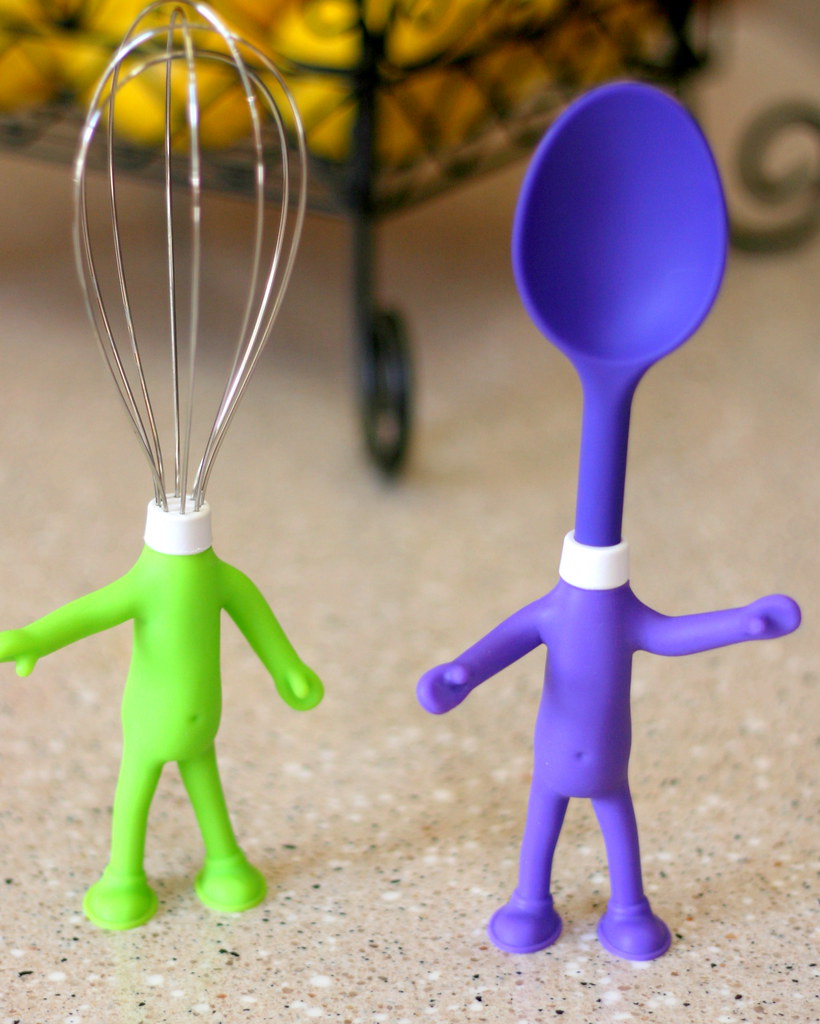
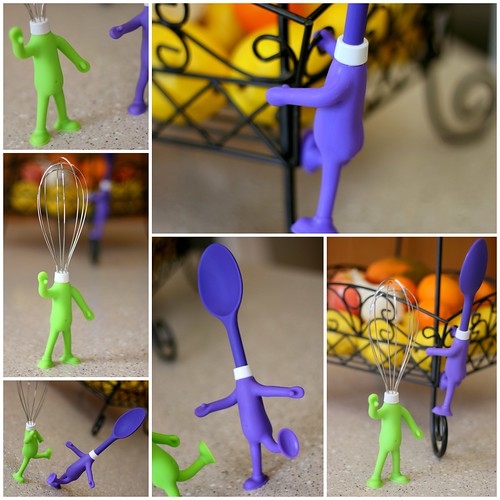
This time - she included these adorable Bendable Kitchen Utensils.


Have you ever seen anything so cute? Look at their feet - they are suction cups so they stick to the counter.


I think she intended for them to be for Little K - but hubby has been having just as much fun with them. Every time I go into the kitchen, they are in a new position.

To answer your question...NO - they have not yet been used for cooking.

So THANKS Mom! The whole family is enjoying your fun surprise package.


THE END
(Sorry - I just couldn't resist)

PS - They are made by Fiesta and they are called "Head Chefs". I found them on Amazon here.