Showing posts with label Recipes. Show all posts

Thursday, October 17, 2013

Halloween Boo Bag Sweet Treats

I'm finishing up our Neighborhood Boo Bags.  Just a few more details and they will be ready to be secretly delivered.

Every Year we try to include a Home Made Sweet Treat.

Our families current favorite is Peanut Butter Bars - but they are not very colorful (shades and brown and beige), so I decided to switch up the recipe and make them more Halloween Themed.


 White Chocolate Peanut Butter Bars

INGREDIENTS

20 Halloween Oreo Cookies
1/4 Cup Melted Butter

1   Cup Butter
 1 1/2   Cup Creamy Peanut Butter
2   Cups Graham Cracker Crumbs
2   Cups Confectioners Sugar
1/2   Cup Chocolate Chips
1 1/2   Cup White Chocolate Chips
2   Tablespoons Shortening

DIRECTIONS

1.  Melt 1/4 cup butter in medium bowl.  Crush Oreo Cookies (using a food processor) into small crumbs.  Add to melted butter and stir until well coated. 

2.  Spread cookie crumb mixture onto bottom of 9 X 13 pan and refrigerate until firm.

3.  Melt 1 cup butter and peanut butter in large bowl in microwave - stirring frequently until smooth. 

4.  Add graham cracker crumbs and confectioners sugar to melted mixture and stir until well combined.  Set aside.

5.  Melt chocolate chips in microwave until smooth.

6.  Spread melted chocolate over cookie crust (this helps keep the cookie crumbs together and adhere them to the peanut butter layer).

7.  Spread peanut butter mixture evenly over cookie/chocolate crust and refrigerate until set.

8.  Melt white chocolate chips and shortening in microwave - stirring frequently until smooth.

9.  Spread over peanut butter mixture.

10.  Sprinkle with festive Halloween non-pareils, jimmies or quins.

11.  Refrigerate until firm - at least one hour.  Cut into squares.


More tips and details for this recipe are included on my Project Thursday Post over at The Pink Elephant Blog.

Monday, November 28, 2011

Fall Harvest Party

I wish I could share some photos from the Fall Harvest Party with all the tables and linens in place and the food stations filled - but there is just never enough time to get everything prepped AND take pictures.

Leaves

It was a glorious day (and evening). The rains cleared up and all the Fall Leaves were in full color.

Leaves and Candelight

You will just have to imagine that everything looked beautiful and tasted even better. (You can see some of the food prep going on here).


THE MENU

Appetizers:

Fresh Veggie Bar (similar to this)
Soy Aioli & Garlic Creme' Fraiche Dipping Sauces
Roasted Red Pepper Dip with Pita Chips
Tomato Basil Bruschetta (I love the one from Trader Joes)


Main Course:

Italian Stuffed Mushrooms (recipe)
Tropical BBQ Meatballs
Chicken Satay with Peanut Dipping Sauce
Shrimp Cocktail
Roasted Apple, Onion & Squash Tart
Individual Potato Gratins (adapted from this recipe)
Tortellini Skewers
Spam Musabi


Dessert:

Pumpkin Roll (recipe)
Apple Caramel Trifle (recipe)
Pecan Tassies
Chocolate Hazelnut Shortbread Cookies
Peanut Butter Chocolate Chip Bites
Mini Cheesecakes (recipe)

I had each course set up in a different part of the house:

Appetizers at the Breakfast Bar
Main Course in the Dining Room
Desserts and Coffee in the Office
Cocktails were served at the Bar in the Family Room
Beer, Wine, Water and Punch were set up on the Deck outside the Kitchen

This set up helped traffic flowed throughout the evening, so not everyone was clumped in one area.


I used an old cheese box to hold colorful paper napkins.

Cheese Box

I love the patina of the old wood - especially against the burlap table runners.

Burlap Runner

The cheese box inspired me to make something similar for the Buffet Table Centerpiece. I've been keeping some old fence boards from when we had some repairs done.

Centerpiece

I knew I'd find something to make out of them. Because they were pretty weathered (and not very sturdy), I attached them to a solid 1 X 8 pine board base to create a long trough like box.

Centerpiece

Then I filled it to the rim with moss and twigs.

Mushrooms

I couldn't resist adding some mushrooms.

Centerpiece

Pumpkins of all sizes, and gourds and berries.

Centerpiece

I did buy a set of handles, but other than that, everything was from my "collection" of scraps.

Centerpiece

Candles of all different sizes tucked in between the harvest goodies made everything glow.

Centerpiece

It looked so pretty......until the FIRE.

Yep - we had a little Fire. The Candles caught some of the mossy twigs alight.

Open Flame + Dried Wood + Moss.....I guess I should have seen that one coming?

Fire

This isn't the first time something like this has happened - it seems to be an unfortunate tradition at our dinner parties.

Luckily no damage was done and no one got hurt.

Everyone had a wonderful time. It was great to spend some personal time with my husbands Staff and their Families.

Tree

Hands

Everything Fall is now packed away and we're in full swing decorating for Christmas.

I hope you all had a wonderful Thanksgiving.


Thursday, June 30, 2011

Peach Love

It's Peach Season. We went to the Big Farmers Market over the weekend and loaded up with fresh fruit (and other yummies to be shared later).

Peach Season

Got a whole bag of mixed varieties of peaches and nectarines for $1.50/lb.

I knew right away I wanted to make my favorite Peach Tart.

Peach Tart

It's a Paula Deen recipe that I have made many times - using all different kinds of fruits and glazes.

Apricot Jam

The recipe calls for peach jam thinned with orange juice for the glaze. Instead I used some home made Apricot Jam given to me by a friend (thanks Shannon), and Mango Juice (because that's what we have in the fridge).

Peach and Mango

I should have paid a bit more attention the the type of Peaches we bought. These were definitely not Free Stone - so I had to wrestle the slices off the pit and they ended up a little messy.

But that's OK, because it's kind of a rustic desert after all.

So Easy, So Yummy and So Forgiving.

Go and give it a try - before all the peaches are gone.

Sunday, May 15, 2011

Strawberry Shortcake

We stopped by the farm stand on Saturday and picked up a flat of fresh berries. I had planned on making some Strawberry Kiwi Jam, but that will have to wait because we ate them all up...almost.

Strawberries remind me of summer. They were my favorite fruit as a kid. They were always ripe around my birthday in June (when we lived in Pennsylvania). Here in California, they have been in season for at least a month, so I figured it was time to indulge in a taste of Summer.

Strawberry Shortcake

I have to admit. I usually make Strawberry Shortcake using that container of pre-made red gel that they sell in the produce department. But this time, I didn't have any - and I knew there had to be a way to make something better from scratch.

I was quite impressed with the results.


Strawberry Shortcake Fruit Filling

4 pints of berries, tops cut off, washed and quartered
1/2 cup sugar (more or less to taste if needed)
1/4 cup of pomegranate juice (any fruit juice will work)
1 tsp. almond extract
Cornstarch and water

Combine 2 pints of the berries and sugar in saucepan and stir to coat. Allow the berries to sit without heat for approx 15 minutes until the berries begin to release their juices. Add fruit juice and cook mixture until fruit is bubbly and soft, stirring frequently. Remove from heat and carefully puree fruit mixture with a stick blender. Continue cooking on medium heat.

Mix a few tablespoons of cornstarch with water until dissolved. Add cornstarch to fruit mixture (in small batches) stirring continuously until thickened. Add additional cornstarch mixture as needed depending on how thick you like your sauce. The berry sauce will look clear and shiny (not creamy or opaque) when done. Remove from heat and stir in almond extract.

Allow sauce to cool - add remaining 2 pints of cut and washed berries.


This sauce is so yummy. The addition of the almond really makes is special. I can think of dozens of uses for the sauce alone (without the berries) - in lemonade, on waffles, as an ice cream topping, with splash of vodka on the rocks. I may have to make another batch.

shortcake close up

For the Shortcake portion - I use the recipe on the Bisquick box. My only change is that I use cream instead of milk, and maybe a bit more sugar.

The trick is to not overwork the dough while you are mixing it, or forming it into biscuits. It will be sticky and crumbly, and that's OK - they are supposed to look rustic. I also brush the tops with some butter - because everything is better with butter (and bacon, but I couldn't work that into this recipe).

We enjoyed these little beauties with dinner tonight - and have just enough to have another serving tomorrow night - or maybe for breakfast?

Now if only the rain would stop - it would really begin to feel like Summer. Hope you all had a great weekend.

Wednesday, February 16, 2011

Pan Seared Shrimp with Romesco Sauce over Creamy Grits and Greens

Have you been watching the Food Network program - Worst Cooks in America?

I'm not sure why I even started watching this show. I consider myself a decent cook, so it's not like I thought I would learn anything. Maybe it's like watching the American Idol Auditions, you just want to be sure there is someone out there that is worse than you?

I kept watching even after the auditions, and was amazed at the kinds of recipes they were teaching these self proclaimed terrible cooks. I was shocked at the techniques and ingredients that I was not familiar with.

Pan Seared Shrimp with Romesco Sauce over Creamy Grits and Greens

A few weeks ago they featured this recipe.

It included:

Shelled and Deveined Shrimp (I've always purchased mine already deveined and had no idea how to do it myself).

Creamy Grits (seen them made - never eaten them or cooked them at home)

Mustard Greens (unless you count spinach - I've never cooked any kind of greens)

Romesco Sauce (I'm a total sauce girl, and even I didn't know what this was)

Grapeseed Oil (again, seen it, heard of it, but never used it)

In case you lost count - that 5 ingredients that I have never used before. How can that be? I'm a good cook! I watch all kinds of cooking shows and try all sorts of new recipes.

New Ingredients

There was no way I was going to have the Worst Cooks in America be better skilled than me.

The Challenge was ON - I was going to make this recipe!
The first hurdle was deveining the shrimp.

Looking for the Vein

It's supposed to run along the back of the shrimp.

The Vein

Just cut along the vein with a sharp knife and it can be pulled right out.

Sometimes the vein is hidden.

Hidden Vein

This one was along the belly of the shrimp. But it works just the same - cut with a knife along the vein and pull it out.

Deveined Shrimp

OK - that was easy enough. All the shrimp peeled and deveined.

Now on the the Sauce. I think I've actually had this sauce (and even tried to replicate it at home). One of my favorite dishes at a local restaurant back home in Pennsylvania serves delicious crab cakes with a Roasted Red Pepper Sauce. It think it might be the same as the Romesco Sauce (just without the fancy name).

Romesco Sauce

It's easy peasy to make. Just throw everything into a food processor and blend away. It reminds me of a pesto because it has nuts, herbs, garlic and oil, but What's interesting about this sauce is that it's thickened with crusty bread (crumbs) rather than Parmesan or Romano cheese.

Greens and Bread

Now that the sauce is made, on to the Grits. My only comment would be to follow the liquid/grits ratio on your particular brand of grits. When I used the proportions in the recipe, the grits were way to thick and I had to almost double the liquid (and therefore ended up with way more grits than I needed but had them for breakfast the next day - Yum).

They stayed nice and warm parked on the back of my cooktop.

Greens

The greens were much easier than I expected. For some reason I thought they had to cook for hours on end with a ham bone or some kind of fatty seasoning to take out the bitterness. Not the case - they were basically just wilted in a saucepan just like I've done spinach. The dash of red pepper flakes was a nice addition.

Pan Searing Shrimp

Now that the shrimp were all cleaned and ready to go, they only had to be seared for a few minutes and then the pan deglazed.

IMG_9999_26

The finished dish was beautiful and delicious, and I feel better having mastered several new techniques and ingredients.

The final episode of Worst Cooks in America is on this Sunday night - I'll have to watch to see I can make the final meal, or if there is still more I need to learn.

I guess it's never too late to teach an old dog new tricks.

Thursday, January 13, 2011

Pantry Cooking

At this time of year - it seems the Crock Pot and I are old friends. But some times I'm just not in the mood for something soupy - or shredded.

But I still don't make the time to meal plan (or grocery shop), so I love having recipes that use mostly pantry items - things that I always have on hand.

This is one of my favorites. I usually have frozen hamburger, but even when I don't remember to let it thaw - I can always run to the store and pick up just that one item. Or better yet - have hubby pick it up on his way home. All the other ingredients are part of my Pantry Staples.

Warning: these photos are not pretty. The finished product is brown, covered with brown. I didn't even dress up the plate with a green garnish - because it was late - and we were hungry.

I tried to add some pretty yellow corn in the background for color - with a beautiful dob of butter melting on the top. But sweet hubby tried to help and mixed it all together before I got a photo.

But it tastes yummy - and that's what really counts (at least when you are pantry cooking).


Pantry Cooking

Ketchup. Lea and Perrin's (because I can't spell Worcestershire Sauce), Bread Crumbs (Italian Seasoned - of course), mustard (only the spicy brown kind will do for my tastes), and Canned French Onion Soup.

I use the canned Onion Soup almost as much as I use the dry packets. If it's not one of your Pantry Staples - you should give it a try. You will be amazed at what you can season with that lovely little can.

IMG_9999_20

Salt, pepper, eggs (had to check on that one since we used a ton with our holiday baking) and ground beef.

2011_01_10

Mix together the ground beef, egg, bread crumbs, salt and pepper and part of the can of soup. Form the mixture into patties. They have to be oval shaped - or else they will look like Hamburgers. Salisbury Steak patties are always oval. Don't know why - but I guarantee they won't taste the same if they are not oval.

The patties are browned in a saucepan (use a little oil if you hamburger meat is low fat) and removed from the pan. The remaining ingredients are then added to the pan to bring up all the lovely brown bits from the bottom and stirred together. Add the patties back in, cover and let simmer until cooked through.

IMG_9999_34

I added an extra can of soup in the meal shown in this photo - because we also had mashed potatoes and I like lots of gravy. The basic recipe creates less sauce and is usually served on a platter rather than in a bowl. The patties are always super moist and tasty because they have cooked in the sauce.


Salisbury Steak

1 10 1/2 oz. can condensed French Onion Soup
1 1/2 lbs ground beef
1/2 cup dry breadcrumbs
1 large egg
1/4 tsp. salt
dash pepper

1/4 cup ketchup
1 tsp. Worcestershire sauce
1/2 Tablespoon prepared mustard
1/4 cup water
1 Tablespoon flour

Mix together 1/3 of the can of soup, beef, breadcrumbs, egg, salt and pepper. Shape into 6 oval patties. Brown patties in a saute pan using oil if necessary. Pour off any excess fat and remove patties from pan.
Add remaining soup, ketchup, Worcestershire sauce and mustard. Gently stir. In a small bowl, gradually blend flour into water until smooth and stir into soup mixture. Add patties back into pan, cover and simmer over low heat for 20 minutes or until done, stirring occasionally.

Tuesday, December 28, 2010

French Toast Souffle' Casserole

I've been making this Breakfast Casserole on Christmas Morning for many years.

French Toast Souffle' Casserole

Even though it's only the 3 of us at our house, opening packages tends to take up the better part of the day, and the last thing I want is to be in the kitchen and miss all the fun going on under the Christmas Tree.

This recipe is perfect. It's put together the night before and the flavors blend together overnight in the fridge. Then I just pop it in the oven an hour before we are ready to eat.


FRENCH TOAST SOUFFLE' CASSEROLE

approx. 16 slices of stale white bread (cut into cubes)
8 oz. cream cheese (softened)
12 eggs
2 cups heavy whipping cream
1 cup real maple syrup

Grease a 9 X 13 pan. Place bread cubes in pan. Beat cream cheese, eggs syrup and heavy cream together until light and fluffy. Pour over bread cubes. Cover and refrigerate overnight. Let stand at room temperature for 30 minutes. Drizzle with more maple syrup. Bake at 375 degrees for 40-50 minutes until set (cover with foil after 25 minutes of baking to prevent over browning)

Even though it's a casserole, it acts like a souffle' and will come out of the oven all tall and puffy, and will deflate over time. The recipe is also very forgiving. I always forget how many eggs it takes, and this year I didn't have a full dozen, so I only used 8. I was also short on heavy cream, and substituted low fat milk, and it turned out just fine. I have added fresh fruit before baking (blueberries are great) and sprinkled with cinnamon and raisins or powdered sugar.

I like the fluffy middle parts. Gary likes the crispy corners, and Little K like the edges with a little bit of each. Something for everyone.

Happy Holidays!


The original recipe credit goes to a co-worker Nicole Bishop. It's from a cook book put together by the employees that worked in the Men's Buying Department at the Sears Corporate Offices in Chicago.

Monday, February 8, 2010

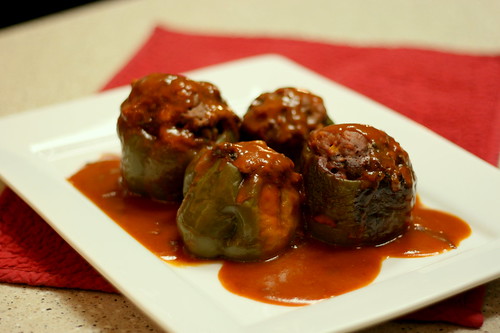
Crock Pot Stuffed Peppers

I've been using my trusty Crock Pot a lot lately. I love coming home to a house that smells like home cooking, but I have to admit, all my slow cooker recipes seem to fall into one of two categories:

Some kind of Meat Stew
OR
Chicken in a "cream of soup" Sauce

There are hundreds of variations on these same basic recipes, and I love them all....but was looking for something different that didn't seem like it was cooked in the Crock Pot.

April to the rescue. My friend (April) sent me this recipe for Stuffed Peppers. It just so happened that I had peppers growing in the garden (yep - we can do that here in Arizona in the winter).


They are green bell peppers, but I kept them on the plant extra long and some ripened to this lovely orange shade. Aren't they pretty.


After a few hours in the Crock Pot, stuffed with ground meat and seasoning - they came out looking like I had slaved in the kitchen.

I'm actually not a fan of peppers (I think it's a texture thing), but my husband likes them - so this dinner was really for him. I'll admit, I didn't eat the pepper shell, but the inside meat stuffing was delicious, and tasted wonderful with the flavoring from being cooked in the pepper. I served it with mashed potatoes (all the better to sop up that yummy tomato gravy).


SLOW COOKER STUFFED PEPPERS

5 Bell Peppers
1/2 lb Lean Ground Beef
1 Packet Dry Soup/Seasoning Mix (Onion or any flavor of choice)
1 11 0z Can Whole Corn (drained)
1 T Worcestershire Sauce
1 T Prepared Mustard
2 10 3/4 oz Cans Condensed Tomato Soup

Slice tops off each pepper. Remove and discard core, seeds and membrane. In a bowl, combine beef, dry seasoning mix and corn. Spoon mixture into prepared peppers. Stand peppers up in slow cooker. Combine Worcestershire sauce, mustard and undiluted canned soup. Pour over peppers. cover and cook on low for 7-8 hours or until peppers are tender.

Note: Too much fat in the ground beef and it will pool in the bottom of the pepper - so lean is best. Don't be afraid to try unusual seasoning mixes. I was out of onion, and used a spinach dip that was delicious.

Thursday, November 12, 2009

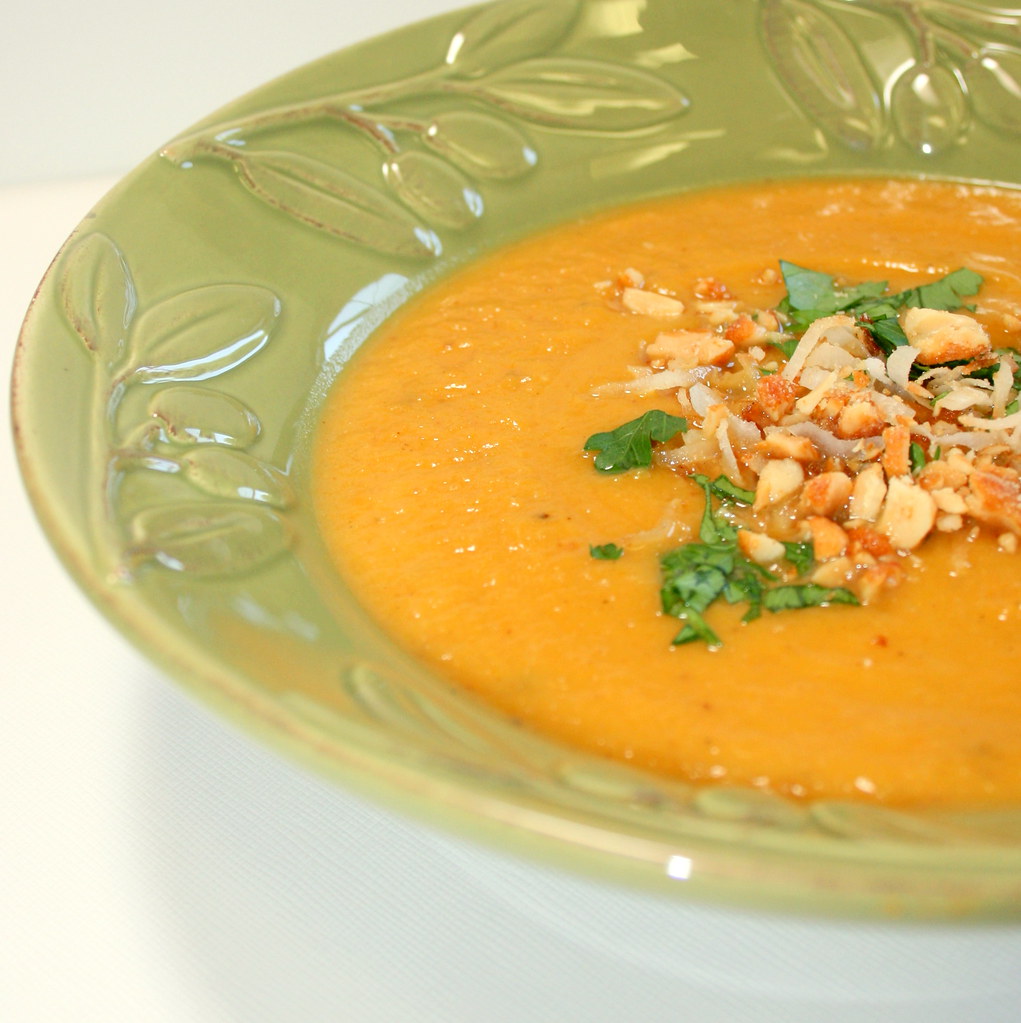
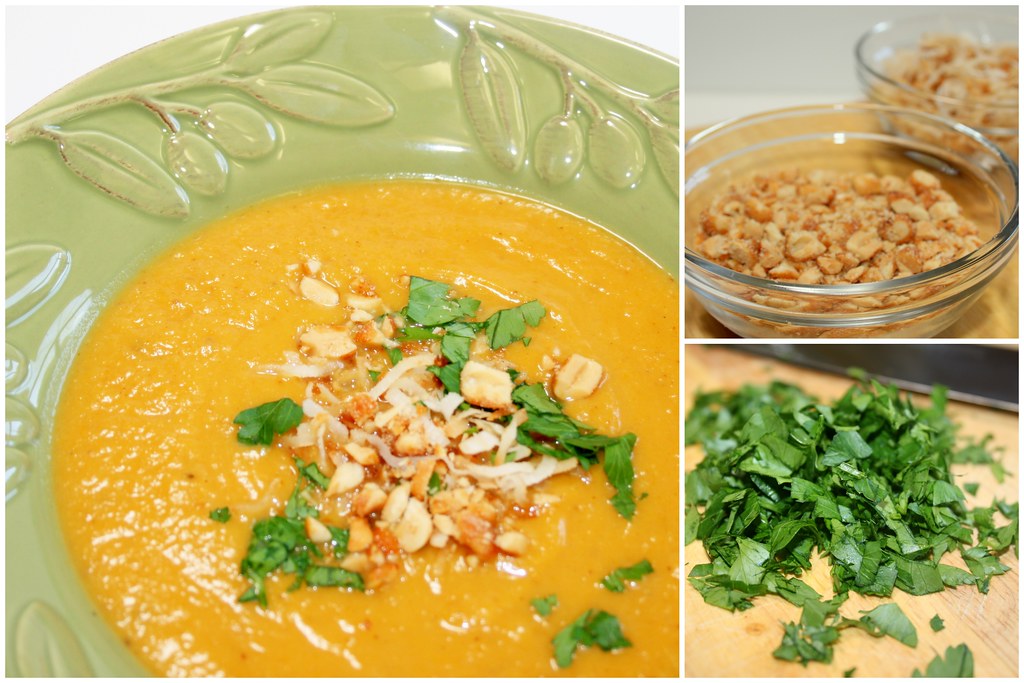
Butternut Curry Soup

I've really been missing my East Coast Roots this Fall. Wishing I could see the leaves change colors and waiting for the temperatures to cool down enough to be able to wear a scarf, or even long sleeves.

If it doesn't feel like fall outside, at least I can make it smell like fall inside - so I roasted up some veggies and made this delicious soup.


I was inspired by this recipe by Ina Garten, but I made a few changes. Not because I think I can improve in any way on what the Contessa has created, but mostly because I didn't have all the required ingredients on hand, plus I had a few more I wanted to include.


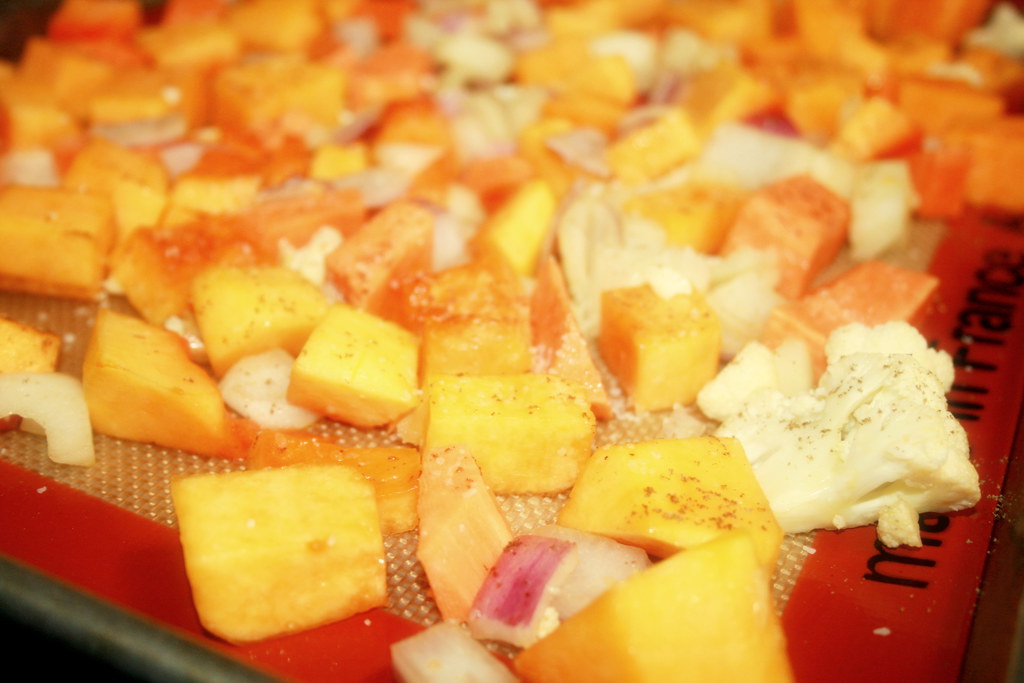
The vegetables were gathered up from the the fridge, peeled, cubed, tossed with olive oil and seasoned with salt and pepper. Then roasted in a 425 degree oven about 45 minutes or until tender.

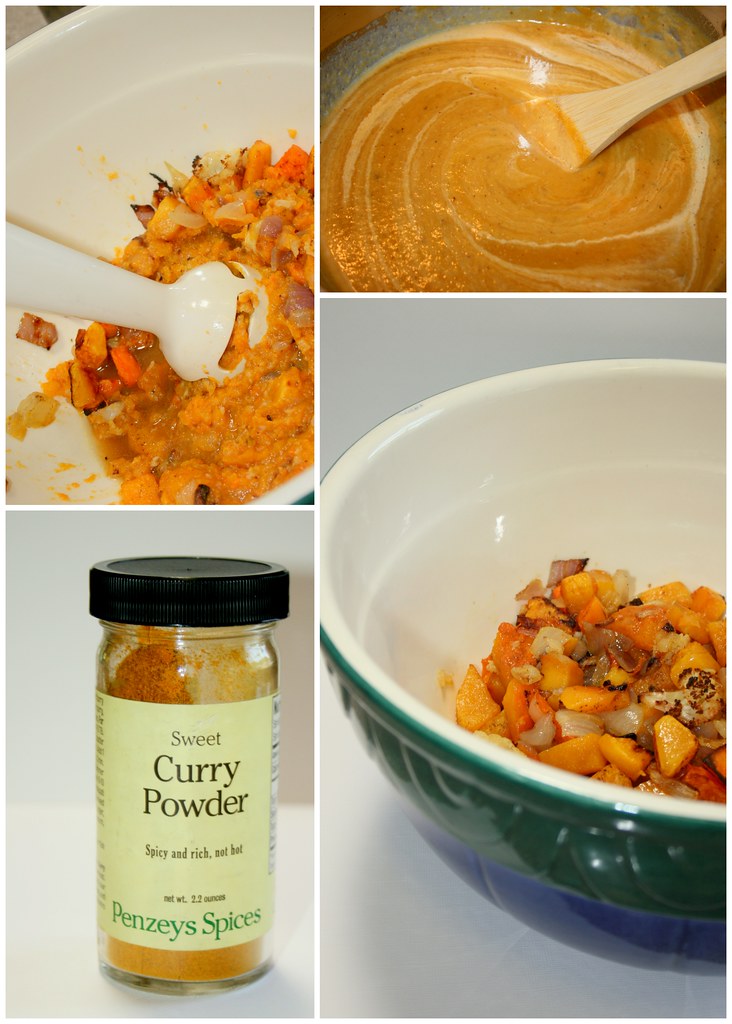
After roasting, I pureed the vegetables with a stick blender (one of my favorite tools) along with some spices (curry powder, toasted onion powder, and garlic salt) adding chicken stock and a little heavy cream.


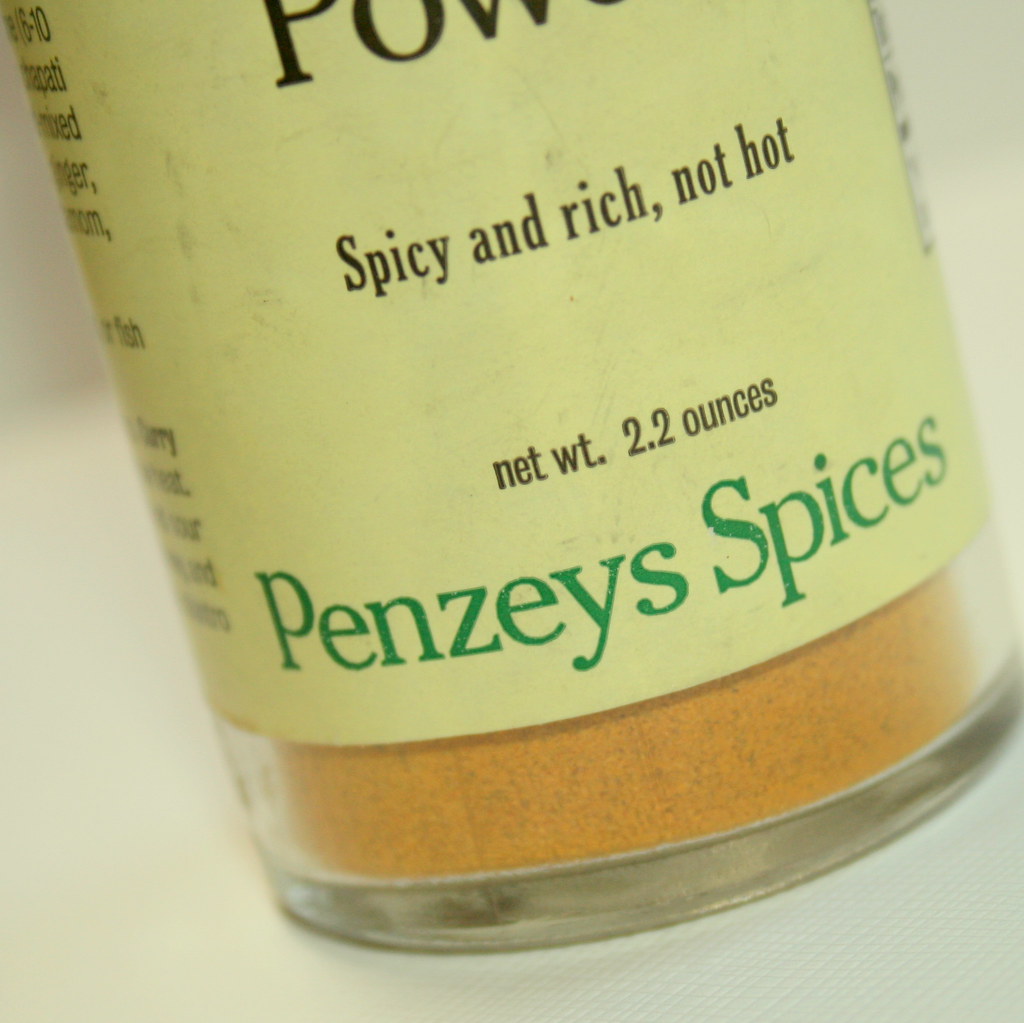
I get most of my spices from Penzeys. I used to order them on-line, or from their catalog, but now I live in a city where they actually have a retail store - I'm like a kid in a candy store. I never knew there were so many versions of even the basic spices, and they do a fantastic job navigating you through what could be an overwhelming spice journey. Not to mention they have wonderful recipes in their catalog.


When the soup was done, we added a few condiments - chopped peanuts, cilantro and toasted coconut.
I'm definitely feeling a bit more like Fall now.


Roasted Butternut Curry Soup

2 butternut squash, peeled, seeded and cut into cubes
1 sweet potato, peeled and cut into cubes
1 head cauliflower, cut into cubes
2 apples (your choice) peeled, cored and cut into cubes
1 red onion, peeled and cut into cubes
4 cups chicken stock
1/2 cup heavy cream
1/2 teaspoon curry powder
1/4 teaspoon toasted onion powder
1/4 teaspoon garlic salt

olive oil, kosher salt, fresh ground pepper

Toss vegetables in olive oil and season with salt and pepper. Spread vegetable on a sheet pan and roast in a 425 degree oven for 45 minutes or until tender. Allow to cool slightly. Place roasted vegetables in a soup pot and add part of the chicken stock. Puree with a stick blender, adding the rest of the chicken stock until desired consistency. Add curry, onion and garlic powder/salt and continue to blend. Add more salt and pepper if needed. Bring to a boil and reduce heat to a simmer. Add heavy cream and stir until combined. Served with your choice of chopped condiments (coconut, green onions, cilantro, cashews, peanuts).
Disclaimer: I don't usually measure or keep track when I cook, so quantities are approximate to the best of my recollection. Go with your instincts and toss in what you like - including a little love!


Wednesday, September 16, 2009

Pasta for Everyone

Little K and I had the great idea to make pasta - from scratch! I'm not quite sure why, since you can buy a box of pasta in any flavor, or shape you want for just around a dollar. I guess it was the thought of playing around in the messy dough that appealed to both of us. Besides, isn't anything home made Better than store bought?

So with that thought in mind - we got started.


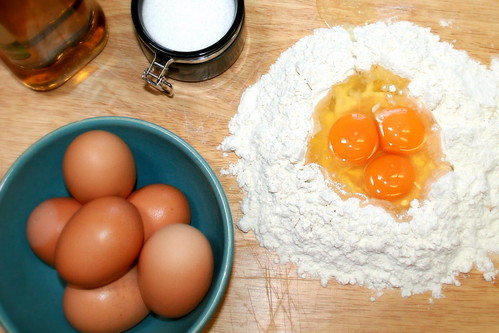
The ingredients are simple. Just Eggs, Flour, Olive Oil and Salt. I'm sure a real Italian cook would just mix it all together until it felt right. But we needed to at least start with a recipe.

Homemade Pasta

3 1/2 cups all purpose flour
5 large eggs
1 teaspoon salt
1 tablespoon olive oil

Mound flour in the center of a large board. Make a well in the flour and break the eggs into the center. Sprinkle on the salt and add the oil. With your fingertips, mix the eggs into the flour gradually incorporating the walls of the well. When all the eggs are mixed with the flour, knead the dough until it is smooth and elastic. It will be very firm and should be quite smooth, the kneading process will take about 10 minutes.

Roll the dough into long strips. Dry the strips slightly (we use a long handled wooden spoon). After the dough is slightly dry, (don't wait too long or the dough will be too brittle to cut), cut the strips into desired shapes (long thin strips). Dry on a rack until ready to use.

Incorporating the flour into the eggs was a lot of fun. That's Little K doing all the work. Look at that beautiful golden color. I swear it's from the brown eggs I use.


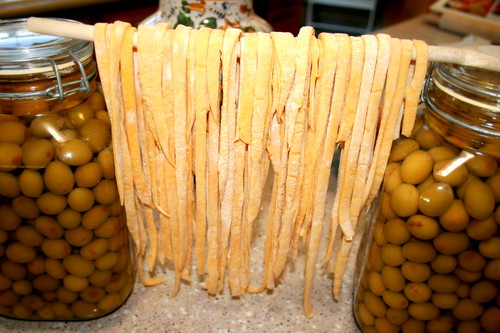
Two huge jars of olives I keep on my kitchen counter worked perfect as a drying station for the pasta. We used a long wooden spoon across the top, and hung the cut pasta strips over the spoon.


As we were cutting the strips, I was really wishing I had bought that pasta machine I wanted for making Skulpy Clay creations. I'm not sure why, but the the shape, and thickness of the pasta effects the taste, and it's pretty difficult to get the pasta thin enough when you are rolling by hand (at least for us it was).

I won't say it was the best tasting pasta we have ever had. I think if we were able to make the strips narrower and thinner, they would have tasted better. But we had loads of fun making our noodles, and I'm sure we'll do it again soon.


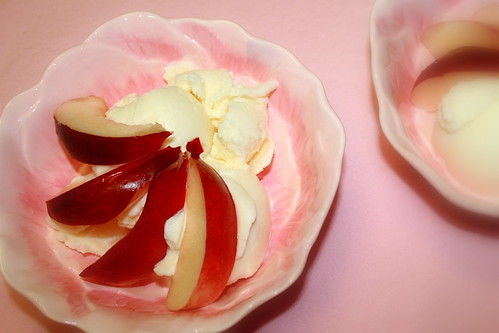
While we were waiting for the pasta to dry, we whipped up some home made vanilla ice cream to eat with these delicious white nectarines. The Pasta may not have been perfect...but the ice cream was pretty close, and definitely better than last time....I think we finally have it figured out.

So come on over for dinner. We always have the ingredients on hand for Homemade Pasta and Vanilla Ice Cream.