Showing posts with label Home Keeping. Show all posts

Thursday, September 26, 2013

Homework Station

We have been in school for 5 weeks this year so far - and this is what our Kitchen Counter often looks like:


To tell the Truth - it almost ALWAYS looks like this.

Homework never gets done in one sitting, so the homework supplies stay out all afternoon, and night and usually the next morning (for those last minute study sessions).

I decided it was time to Tame the Beast and Take Back our Kitchen Counter.

Ta Da...We Now have a Designated Homework Station!


 I would have loved to fill it with Fun Bright Colored accessories - but since it's in the middle of the Kitchen - and can be seen from all over the first floor - I decided to keep things neutral.

Everything essential for homework has it's place.


Text Books are covered with Newsprint Wrapping Paper (I added clear Contact Paper for extra durability).


 The books were covered - but not yet labeled - for at least a week.  

 I thought it was fun searching for the right text book - Little K....not so much. 

I used Red bordered labels - and my Old Fashioned typewriter - to make the Subject Labels.

  
Baskets of all different sizes are used to corral the clutter.  

Each one has it's own clever hang tag:

PLUG IT IN (electronic devices and chargers)
TAKE NOTE (note cards and sticky notes)
GO AWAY (erasers and white out) 
KEEP IT TOGETHER (paper clips and glue sticks)


 Cans of different sizes are wrapped with Scrap Book Paper (you could also use the same wrapping paper from the Text Book Covers). 

  
Look at these happy colored rubber bands - tucked inside one of the cans. 


 Colored pencils add another splash of bright.


Smaller baskets keep little bits in place, and cardboard magazine holders hide notebooks and paper packs (I plan on covering the white holders with more newsprint paper).  


 Another wrapped can holds a supply of sharpened pencils (that will somehow disappear completely within a few weeks).  


The bookcase that holds it all - is right next to the kitchen counter where homework is done. 

I didn't expect that everything would be neat and tidy all the time, and the counter is still filled with books and papers most of the afternoon and evening.  But our Homework Station has kept a lot of the little bits in place and made it much quicker to put things away (for her, and for me).

Now I need to do the same kind of organizing for the other place that homework gets done....the car. 


Friday, December 10, 2010

Ten on Ten: December

The concept is simple, but oh so sweet:

A photo taken every hour, for ten consecutive hours, on the tenth of the month. You can read more about it here.

Today was spent mostly around the house doing the same things over and over - laundry and putting up decorations. So as not to bore you with 10 photos of piles of clothes I took a moment each hour to capture some of my favorite Holiday inspired things around our house.

Christmas Mugs

More Decor

At the Market

A little Birdie

Park Here

Snail Mail

Sledding

The Mantle

Oatmeal Raisin

Outdoor Bokeh

Still lots more decorations to put up, but it's beginning to look a lot like Christmas around here.

Monday, November 8, 2010

Shelf Paper

Am I the only person in the world who uses Shelf Paper?

Actually - based on the condition of the inside of the cabinets when we moved into our new home - you don't need to answer that.

In the Beginning

And based on the very limited options of Shelf Paper in the stores - you don't need to answer that.

Shelf Paper

Clearly - I am the only person that still uses Shelf Paper.
I don't know why I do? Maybe it was years of living in college dorms and not so clean apartments that made me want to cover up all signs of a previous tenant. Maybe it's because many of our homes have been older and have shown wear and tear? Maybe it was what my Mom taught me? Maybe I just have issues?
All Clean

Whatever the reason, there is nothing better (to me) than a nice clean foundation to put away all your personal belongings.

In our new house - we have some really cool cabinets - so it was kind of fun.

Pantry

This is our kitchen pantry - with shelves lining the inside of the doors and fold away hinged shelves inside to get access to the full depth of the cabinet.

Magic Silverware Drawer

The silverware drawer is behind a fold down drawer front - complete with built in dividers and a cutting board.

My Helper

Thank goodness for Little K's helping hands. I'm too old to be down on my hands and knees reaching those bottom cabinets.

My favorite "surprise" was this one. Any guesses as to what's behind this drawer?

Hidden Surprise

Have you figured it out yet?

Keep Guessing

Yep - a built in ironing board spring loaded in one of the Laundry Room drawers.

Ironing Board

Funny thing is - we had no idea it was there until I started to line the drawers.

Sweet hubby had been living in the house for almost a month - sleeping on an air mattress, with none of our household belongings (while we were packing up in AZ).

He even went out and purchased an iron so he could iron his work shirts. He was using the kitchen counter as an ironing board, when all the while - this perfectly good ironing board was in the next room mocking him.

Everything is all put away and most of this pretty clean shelf paper can no longer be seen. But I feel better knowing it's there.

Saturday, June 19, 2010

Sale Pending......

Well, it should really say SOLD! But, neither our Realtor or I wanted to jinx the sale, so she waited until the final days to put up the Sold sign. By then we had already moved out of our beloved home in Arizona and therefore I missed the SOLD sign photo opp.


Sale Pending made me just as happy! In a very tough Real Estate Market (from what the news reports say, Phoenix is one of the worst in the country) we were thrilled to be able to sell our home after being on the market for just over a month.

Don't get me wrong - this was in no way a profitable sale for us. We listed our home at a price that was almost 30% below what we purchased it for just 3 years ago. And we ended up selling it for even less than that. But in a time when many of our neighbors homes are going into Foreclosure or being listed as Short Sales, I am so thankful we were able to accept an offer that allowed us to move forward with our new life in California.

It's been a little crazy around here these past few months, and I've sadly neglected my blogging duties, but we're on the home stretch now, and I'm looking forward to getting back in touch.

Along with all the usual steps you take when selling your home - De-clutter, Clean, Neutralize and Stage - I'd like to think we did a few unique things that made a difference in getting it sold.


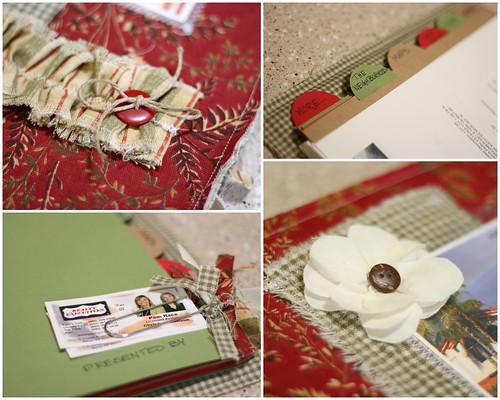
You know that binder that the Title Company provides that is filled with all the Plot and Survey information as well as Maps and Neighborhood Stats? It usually comes with an ugly blue or black plastic cover with basic tabs.

Our book started out Blue. My Kitchen is Green. They didn't match!
Solution: make a cute fabric binder cover to coordinate with the room.


I updated the inside tabs and added a few of my own to include Neighborhood News and Happenings as well as a personal letter from us telling what we love about the home and neighborhood.


Fresh Flowers always help sell a home and I was only too happy to splurge and buy a new bouquet each week. I might have to continue that little indulgence as a treat for myself once we're moved into our new home. They just make me happy.

Next - my agent suggested I find a way to highlight some of the unique details that could be easily overlooked.
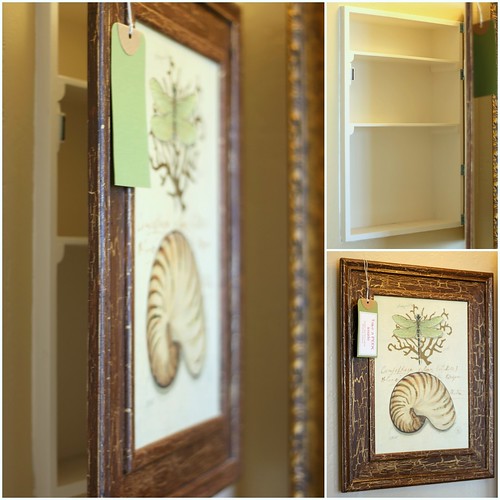
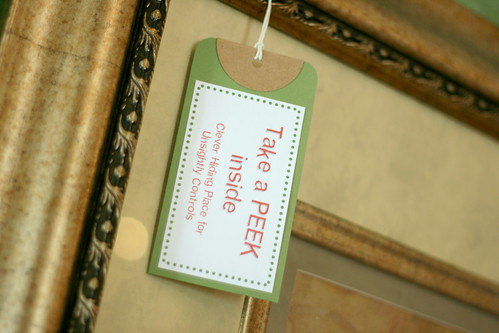
Solution: make Tags with a brief description of the features and place them throughout the house.


I have an unnatural dislike for traditional medicine cabinets. I have yet to see one that I like (not even in the fancy design homes where I've drooled over and coveted so many other things) This is one of the ways I disguise them.


It's just a poster - decoupaged onto a board, framed, painted, distressed and then attached to a wood box made to fit inside the existing medicine cabinet space. OK - that sounds like a lot of work, but you could totally do the same thing with a ready made frame or picture.

I've seen lots of homes that still have these old intercom systems that no longer work. But ours still does, and even though it's not sleek or modern looking, I think it's really cool and we use it all the time.


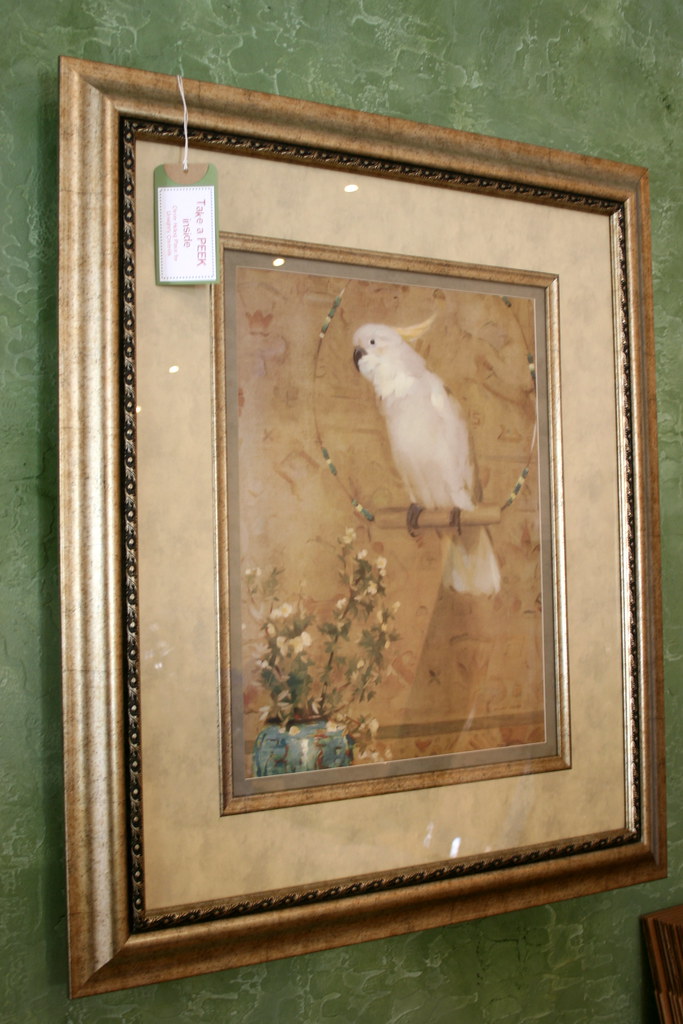
Here's another "tagged" feature. Can you guess what's hiding behind this picture?


I sure hope the new owners like birds - because the framed picture is staying with the house.


Because it's also hinged and attached to a box that's attached to the wall.


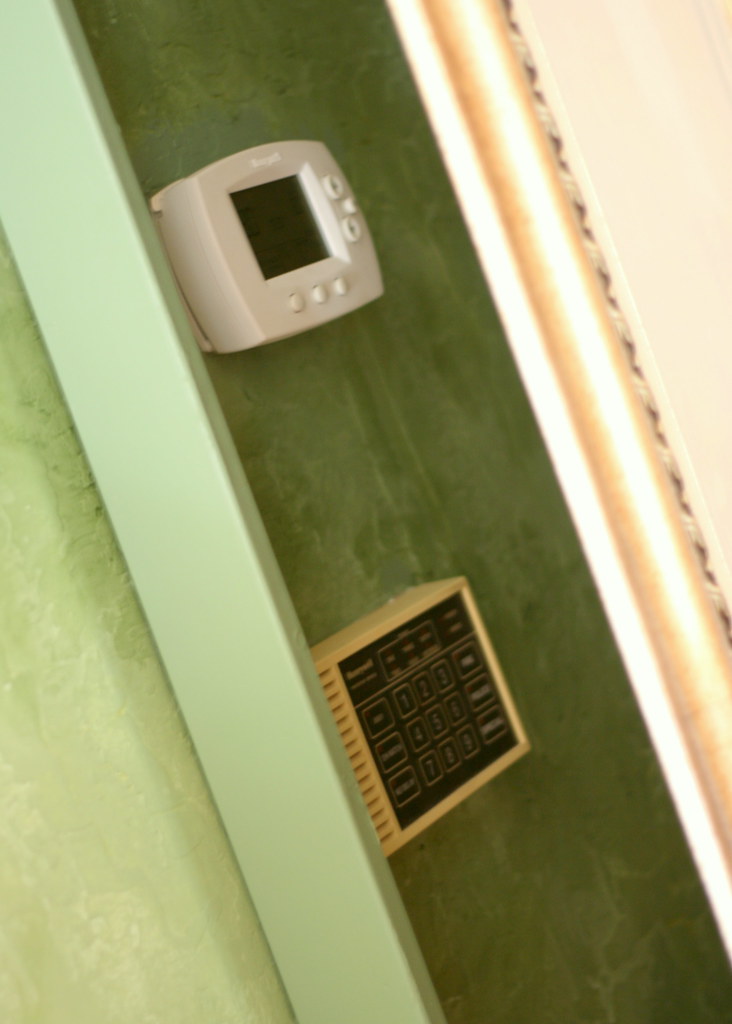
Inside - are the thermostat and security alarm control box. The original builder should be shot for installing those controls smack dab in the middle of the main feature wall in the Living Room, effectively making the entire wall unusable and a complete eyesore. Even if the buyers don't like birds, they will probably think it's better than those unsightly controls.

Our yard is fairly large, and it can get pretty hot in Arizona, so I kept the outside mini fridge stocked with water bottles. With a "tag" on the fridge inviting house hunters to "Refresh Yourself".


Each of the bottles had a label with our home address - and a little reminder that "this could be Your New Home!"

When you look at dozens of homes, they all tend to blur together so I wanted to do everything I could to keep our home foremost in potential buyers minds.


Another shot of the tulips - because they are so pretty - and you know they make me happy.


Just to be sure we had all our bases covered. I had my dear friend Jo Ellen send me a St. Joseph statue to be buried upside down, facing the home that you want to sell. If you are not familiar with this tradition you can read about it here. For the record, I'm not Catholic, but I do believe in God and the power of Faith, and my Catholic friends assured me it was OK to partake in this Catholic belief.

Last week the movers came and packed and loaded up all our belongings to be put into storage. We spent the weekend spackling holes, painting and cleaning - getting the home ready for it's new owners. I driven by once since then - to pick up the mail, drop off the keys, and bring in the trash can. But it's no longer our home - it's now in the care of a another family. Our wish is that the new owners enjoy it as much as we did, and make their own wonderful memories there.

We have a few weeks before we move to our new home in California. I'm excited to get started painting, re-decorating and all the other fun stuff that comes along with the not so fun task of unpacking. I'll keep you posted.

Sunday, February 14, 2010

L O V E

We are all shaped and fashioned by what we Love ~ JOHANN WOLFGANG VON GOETHE


I'll be spending my Valentines Day cleaning the house. Not my favorite thing to do, but it's looking pretty messy, and starting to bug me, so I'll feel good when it's all done.
But the special treat for the day is that Dear Hubby and Little K have decided to cook dinner tonight. A real dinner - not just frozen pizza or mac and cheese. They already have the needed kitchen utensils laid out on the counter (mini food processor, cutting board, measuring bowl, whisk). I have no idea what they are planning. I haven't noticed any cook books sitting out. They made their shopping list first thing and are at the store now getting their ingredients.

The last time my husband cooked for me was 19 years ago, right after we were first married. He made chicken enchiladas. It took him all day - and when I came home from work he was dressed in a black suit with a towel over his arm ready to seat me at the table, and serve dinner. I didn't have the heart to tell him I don't really like Mexican Food that much.
That dinner was delicious. Not because it tasted good (I can't really remember), but because it was something so far out of his comfort zone, and quite difficult for him to do, and he did it anyway to make me happy. And it did.

I think that might have been when we decided on our current domestic agreement - I cook - he cleans.

I'm excited to see what they come up with - and I know it will be delicious...because it is made with L O V E!

Happy Valentines Day. I hope you all get to do something you Love today.

Friday, December 18, 2009

Pretty Little Bench

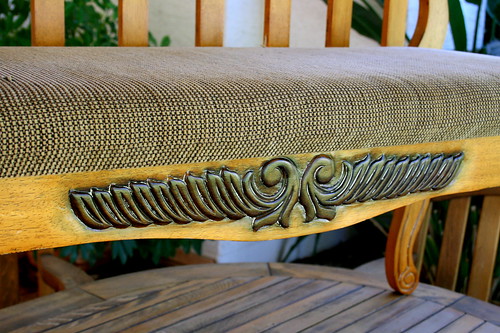
I've been wanting to update this bench since I first got it several years ago. I never liked the chenille seat cover (way too plain).


and the carving on the front was too dark of a a contrast compared to the rest of the bench.

I ordered it on-line, and even though when it arrived it was nothing like what I expected (or remembered) - that little voice inside me whispered "no problem, that's an easy fix - just keep it - you can always change what you don't like".

That was at least 5 years ago, and I'm only just now getting around to making any changes. You would think my now I would have learned not to listen that that little voice?


The good news is, that the bench is now in the kitchen, and it was originally purchased for our dining room. If I had re-covered it immediately, it would need changed now anyway, so it's a good thing I waited. See - I can even rationalize my procrastinating.


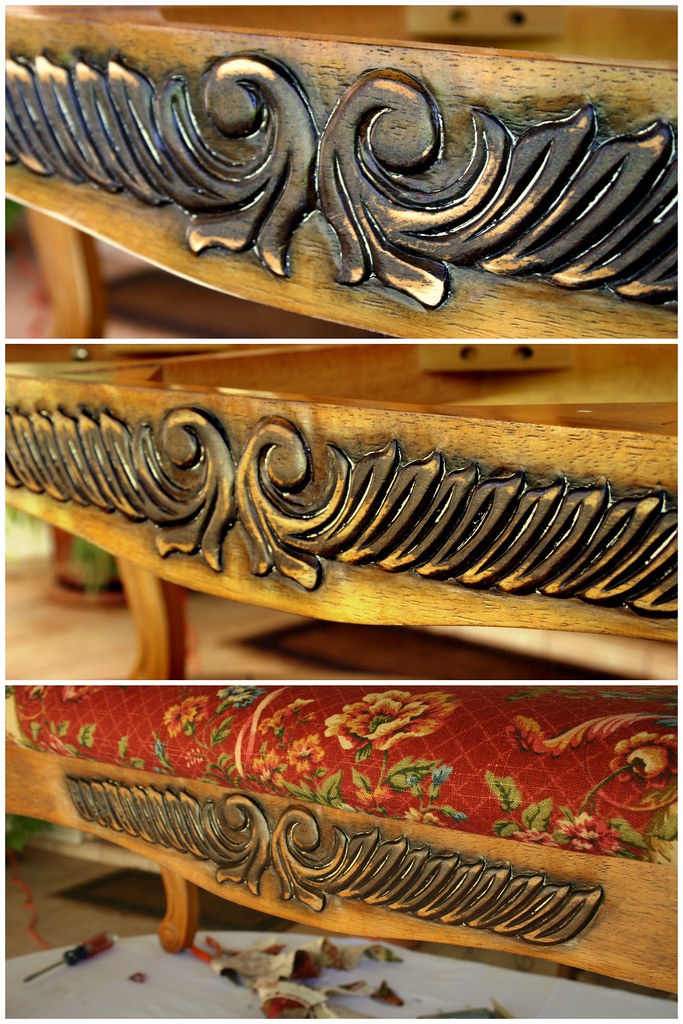
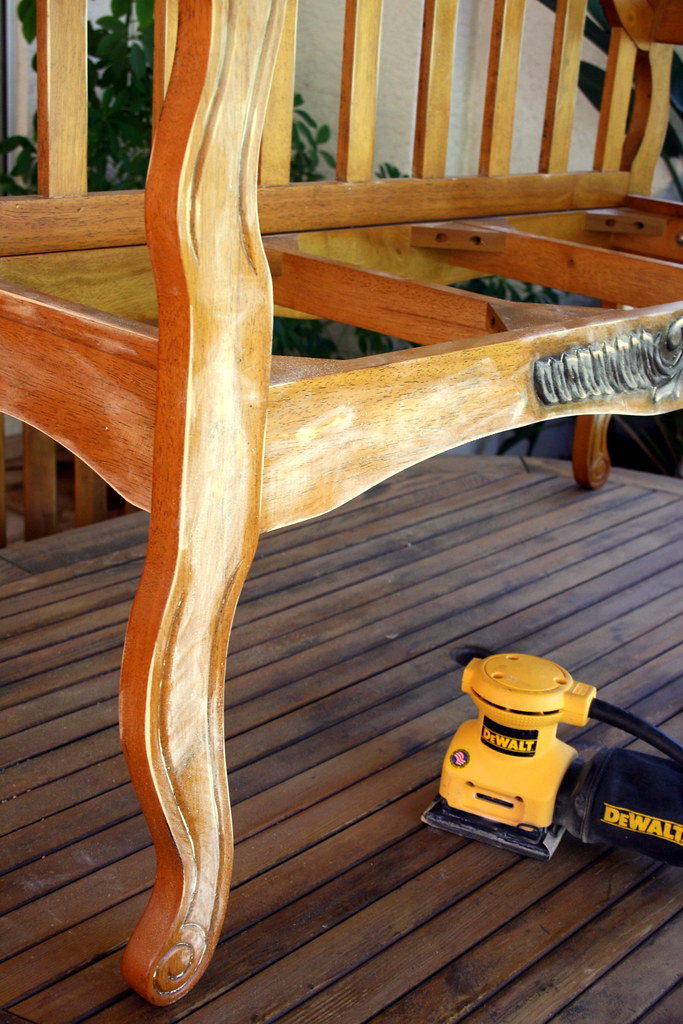
I wanted to change the color, but didn't want to completely strip the good. I got out my favorite palm sander and went to town. Mostly just to scratch up the surface so a new color could be absorbed.


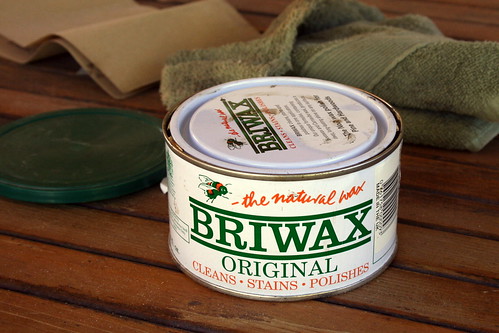
Instead of stain, I used a colored wax furniture polish. This stuff is great. I use it to distress and antique all kinds of new things (when I want them to look old). And I use it to add some color and life to all kinds of old things (when they need to be freshened up).

You just apply with a clean towel or rag, and then wipe it off. You can buff it for a shine, or just rub off the excess for a matte finish. Any bits left in the nooks and crannies will simply harden over time.


However, it's not the best thing if you just had a manicure. Luckily that was not the case for me. I suppose you could wear gloves, but getting dirty if half the fun.


By sanding down some of the dark stain around the front carving, and then adding the Briwax in a darker color all over, they blend together much better. I'm happy now.

Time to start on recovering the bench seat. This one was held to the frame with just a few wood screws. Once the seat was off - I had to remove the chenille fabric. That wasn't the hard part, I just pulled and it ripped right off.


The hard part was pulling out the hundreds (and I do mean hundreds) of staples left behind.

My parents owned an Upholstery Shop when I was younger - I was sure wishing I had one of their handy dandy staple remover tools right about now. I managed to get them all out with a butter knife and a pair of pliers.

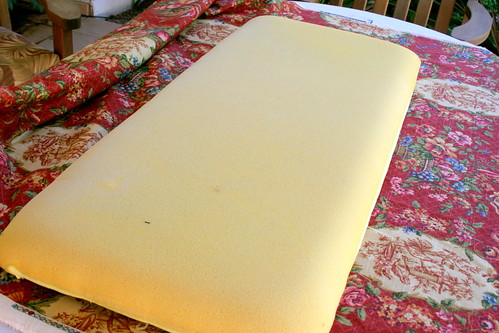
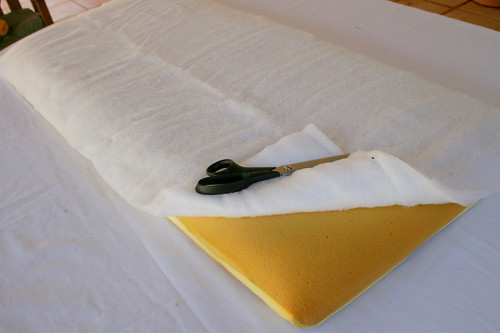
The existing foam was in good shape, so I re-used that.


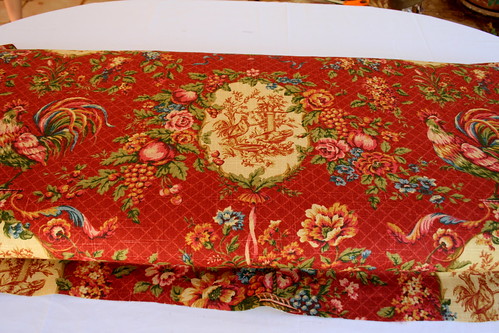
I layed the seat on the fabric to figure out how I wanted the pattern repeated and rough cut the fabric to size.


I added some cotton batting on top of the foam to ensure the edges would be soft and rounded (another Upholstery trick from my parents).


This fabric was a bit tricky to get it positioned just right. A solid or a smaller all over pattern would have been easier. Don't try a plaid on your first attempt - it will be very difficult to get perfectly straight.

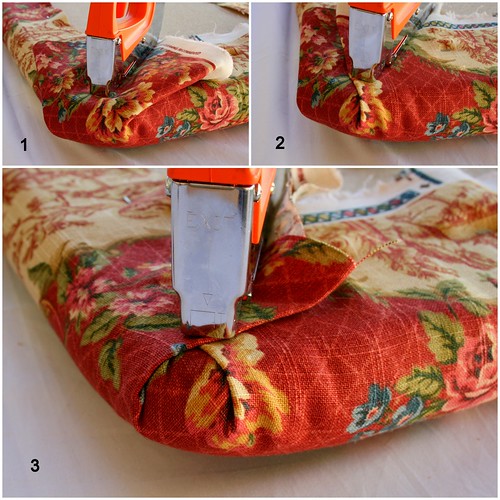
There are lots of options on how to finish the corners. This is the method I prefer. It creates a soft little pleat on the underside, with a rounded top corner.


1) Pull the fabric across the corner and staple in place.

2) Fold over one edge and staple.

3) Fold over the opposite edge and staple. Voila! That's it.

All I had to do now was screw the seat cushion back onto the bench (hubby actually did that for me - smile).


The finished product. The wood color differences are subtle, but I like it much better. It's a warmer tone in a bit darker color, and I'm so happy the fabric now has some personality.


Here it is in the alcove of our Kitchen. That's "Little K" testing it out.